Photography
Modified:
Introduction
I am passionate about photography. Whenever I go out with my family to interesting places, whether for a short bike ride around the neighbourhood, a day out to the countryside, or abroad on holiday, I always take one or more cameras with me, looking for interesting subjects and scenes to capture.
My favourite areas of photography are wildlife, landscapes, panoramas, architecture, sunsets, random objects, and any natural scenes I find. I don’t limit myself to those, but they tend to be what I take photos of the most.

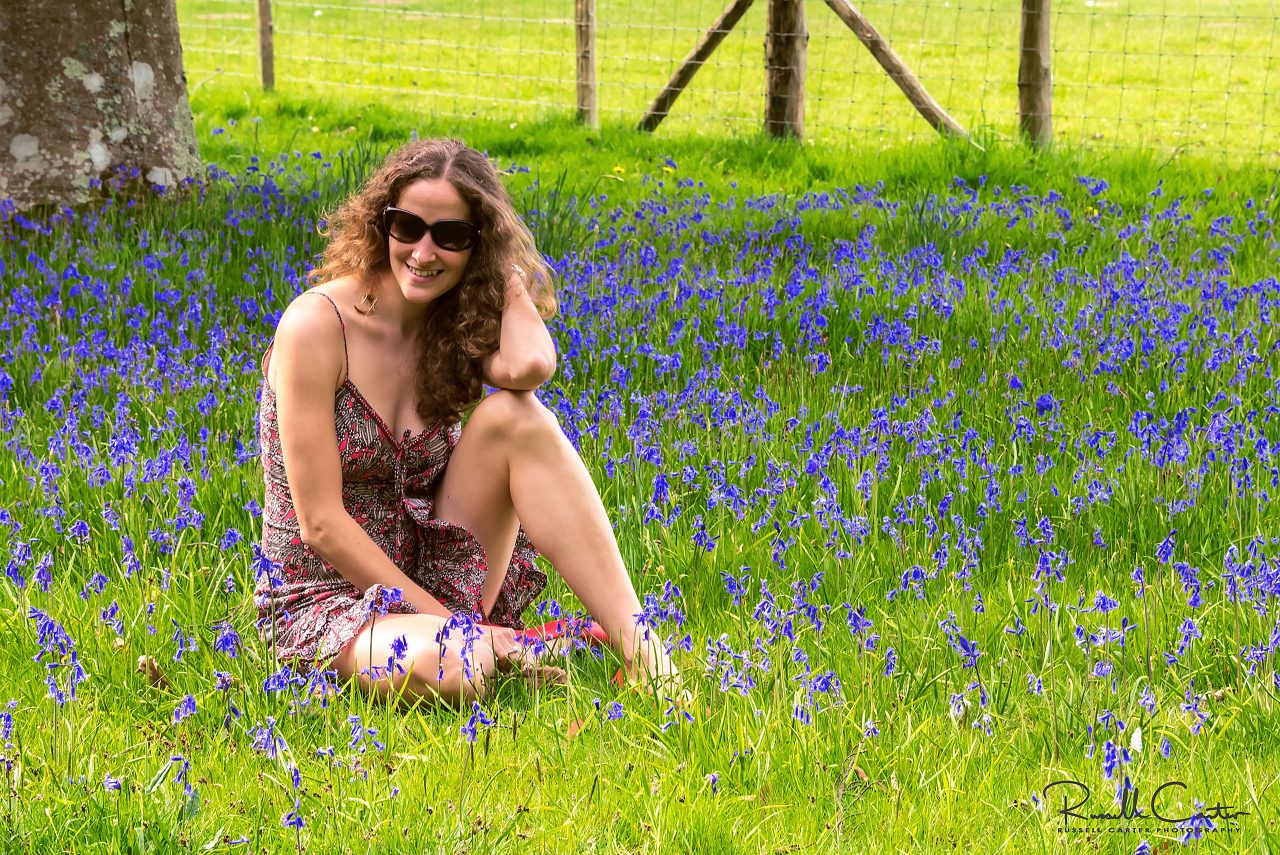
Studio photography and formal portraits aren’t a major focus for me, though I do enjoy capturing candid portraits of friends and family.

 My wife, Rita – Nikon D3200 1/30s f/4.2 ISO 1600
I purchased the Nikon D3200 in 2012, just before we went to Iceland. It’s an entry level camera but produces brilliant photos. At the time I had a Panasonic DMC-ZS10, but I was self-studying the technical side of photography, and wanted a camera with more control.
I have taken around 90,000 photos (as of 2016) over the last 3 years with this camera, and I am still learning. I enjoy both the technical and creative aspects of photography. On the technical side, modifying the camera settings to suit the scene (mode, aperture, ISO, shutter speed, exposure, metering, bracketing, etc,). Creatively, I love composing and framing shots, experimenting with angles and techniques, and refining the final image through post-processing the photo.
When it comes to photography, you never stop learning. I have been learning from day one, and I will never reach a point where I can say I know everything about photography, especially since they are always enhancing the technology, and making what was not possible before a reality now. And there are an infinite number of scenes to be captured in an infinite number of ways.
If you’re passionate about photography, keep exploring, experimenting, and expanding your skills – there’s always something new to discover – there is no limit!
This is what drives my passion with photography – trying different camera settings, new angles, techniques, viewpoints – using my imagination and looking for photo opportunities that people without a camera usually miss. I have been criticised for taking too many photos and of being ‘stuck behind the camera’ and not able to ‘live in the moment’. In response to that I say that I am living in multiple moments simultaneously compared to the average person, because my brain has become conditioned to look for different views and interpretations of scenes all around me.
I like taking interesting photos of scenes that the average person would not give a second glance to. When you walk around you see many things but don’t pay much attention to them. When you have a camera, you start to employ lateral thinking artistically and re-examine apparently mundane scenes.
See my Galleries page for more photos.
Shooting
I almost always use Aperture Priority mode when shooting, as this gives me control over the depth of field, and by adjusting ISO I ensure my shutter speed is adequate – whether a shooting hand-held or on a tripod. In certain circumstances I use Manual mode, for example when trying to take photos of the moon.
Exposure Bracketing – HDR
When composing landscapes with high dynamic range, I often use exposure bracketing to create HDR (high dynamic range) photos, although with the Nikon D750 I can sometimes get away with reducing the exposure, and then recovering detail in the shadows in post. I typically capture three bracketed exposures at -2EV, 0EV, and +2EV. Using more frames with tighter EV intervals can provide additional tonal detail and smoother transitions.

I can also replicate this process on my Samsung Galaxy S22 Ultra with the Open Camera app, which supports exposure bracketing and makes mobile HDR capture surprisingly effective.
This process produces three separate exposures, which I merge using Luminar Neo to create a single image with enhanced tonal depth and dynamic range. You can of course use Photoshop or any other capable application. See the overview of Lumar Neo for more information.
Long Exposure – Smooth Water
Another technique I use to capture smooth, silky water flow is to extend the exposure time. I achieve this by stopping down (narrowing) the aperture and lowering the ISO, and I sometimes combine that with a circular polarizer or neutral density filter to further reduce light and allow for longer shutter speeds. This will require a tripod or other surface to rest the camera on. See the section on Lens Filters for more information.
I don’t use this technique regularly – it really depends on the creative goal for the shot. Sometimes I aim for a subtle motion blur in the water to convey movement, while other times I want to capture individual droplets frozen in mid-air, which calls for a fast shutter speed.
Polarising Filter – Reduced Reflections
In certain circumstances I use a circular polarising filter to reduce reflections and haze, (usually when I remember to bring the filter and to actually put it on the lens!). By rotating the movable part of the filter, you can drastically reduce reflections on water, glass and reduce haze in the sky, resulting in clear water or deep blue skies. It of course depends on your composition and whether you actually want this. It’s important to note that this is something that has to be done on site and cannot be replicated in post-processing. The RAW file will either have been shot with or without the C-PL filter, and there is nothing you can do to change it in software.
Moving Subjects
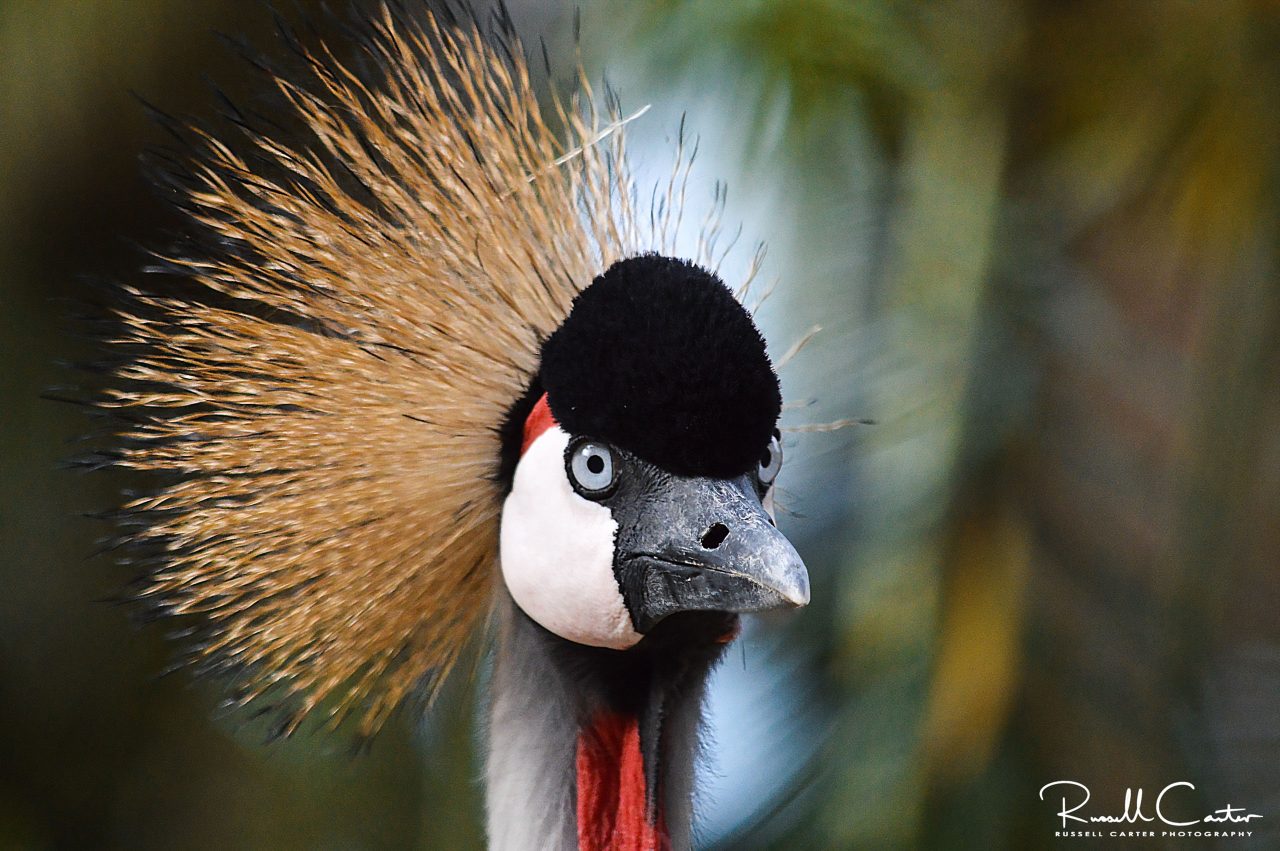
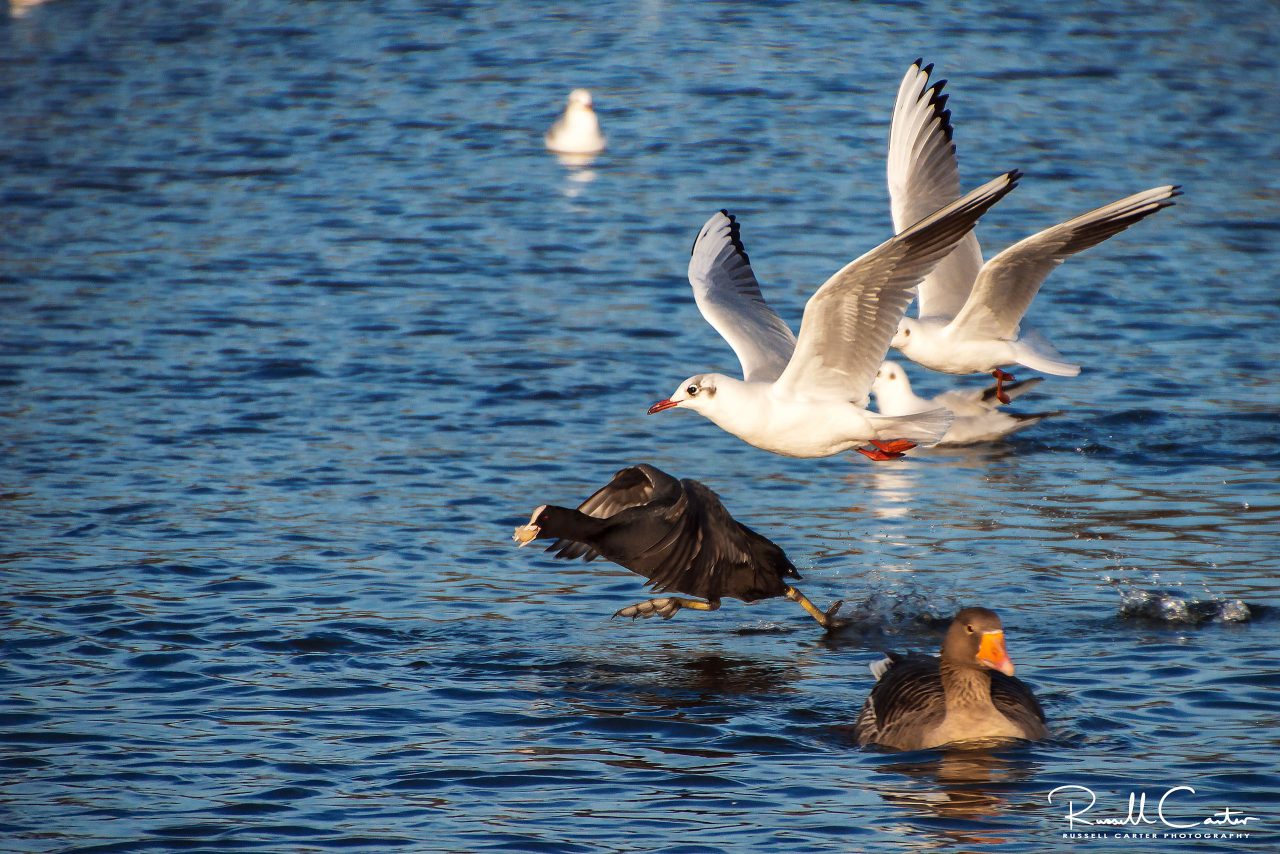
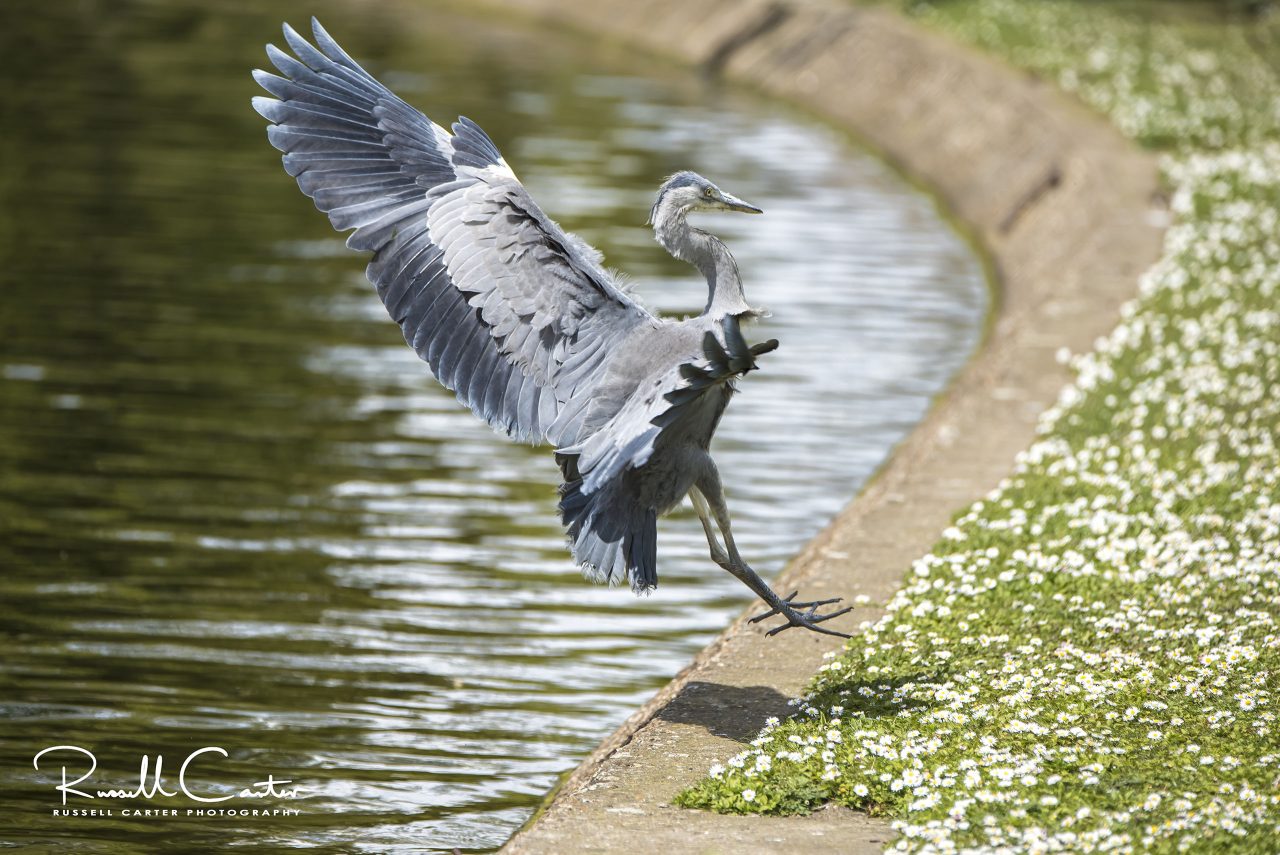
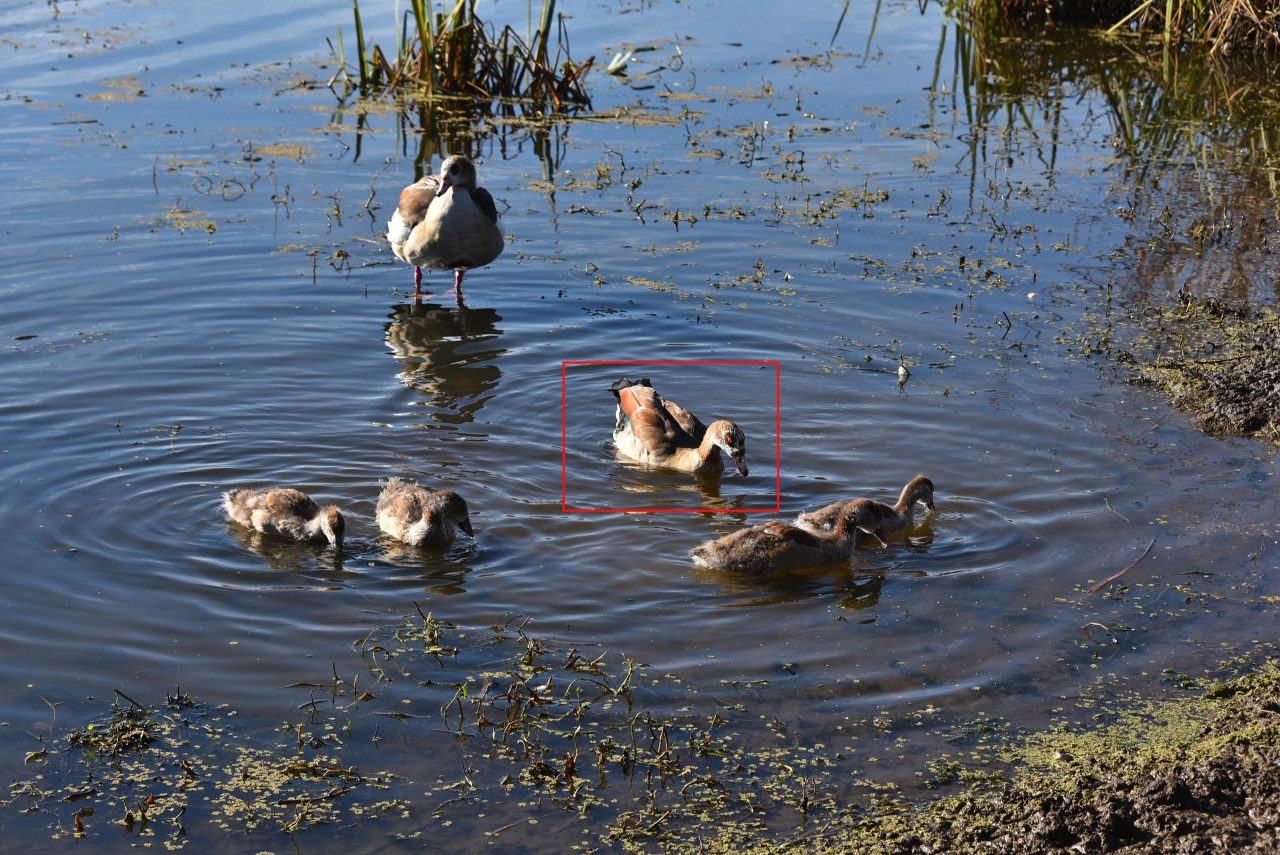
I love to capture birds in flight. The Nikon D750 has 3D tracking autofocus, and combined with a rapid shooting rate of 6.5 frames per second, it allows me to track a bird and get a few decent shots before the bird has gone out of range. I use a telephoto zoom – but the further I zoom in the more difficult it is to find, maintain focus and capture the bird, so it is a delicate balance.
I captured the photo below at 360mm using my Tamron 150–600mm lens – definitely not a shot that’s easy to repeat!
Focus Stacking
This is a technique I have not really used much. It’s useful when composing a scene where the background is distant but includes a foreground element that’s very close. For example, a vertical shot capturing a mountain range in the distance, with a lake and a weathered tree branch just a few meters from the lens.
Stopping down works well when all subjects are relatively far from the camera, but it’s less effective for nearby objects. Pushing the aperture too far introduces diffraction, which softens detail and also cuts down the available light.
While handheld shooting can work for HDR brackets, I find that focus stacking really demands a tripod – unless you’re prepared to do manual masking during post-processing.
Post Processing in General
Please note: The following insights reflect my personal opinion and years of experience as a photography enthusiast.
Post-processing can vary from basic adjustments like cropping, to more advanced edits such as lens correction, modifying lighting and colours, or even removing or replacing elements within the photo. There are essentially no boundaries when crafting a piece of art that conveys your feelings about a scene, whether those feelings are immediate or reflective. The approach to post-processing will often be influenced by the intended use of the photo, though my comments are primarily focused on art produced in a hobby context.
There are many different opinions on post-processing photos, some negative (no pun intended). The main argument for post-processing is that cameras do not have the dynamic range our eyes have, and lenses distort images, so you’re not getting a true representation of the scene as you saw it anyway.
However, beyond addressing the camera’s limitations, certain images may require post-processing to refine the composition, such as cropping out unintended objects from the scene, removing imperfections, adjusting exposure to counteract low light conditions, or altering the photo’s mood, temperature, etc. This however is not a substitute for understanding the conditions and how to setup the camera correctly, or proper framing.

Additionally, there’s the artistic dimension to consider. Numerous techniques exist in photo editing to refine an image into the envisioned or realised final product. For me, post processing is therefore an integral part of the creative photography process.
I don’t post-process all my photos, as some are just family / holiday photos that were taken with the intention of capturing memories, and I have so many I simply don’t have the time. For this reason I capture RAW and JPG copies of each photo. However, if I need to make bulk adjustments to family photos I will use ON1 Photo RAW (I previously used Lightroom) as it is great for applying specific editing settings in bulk, e.g. lens correction, exposure, etc.
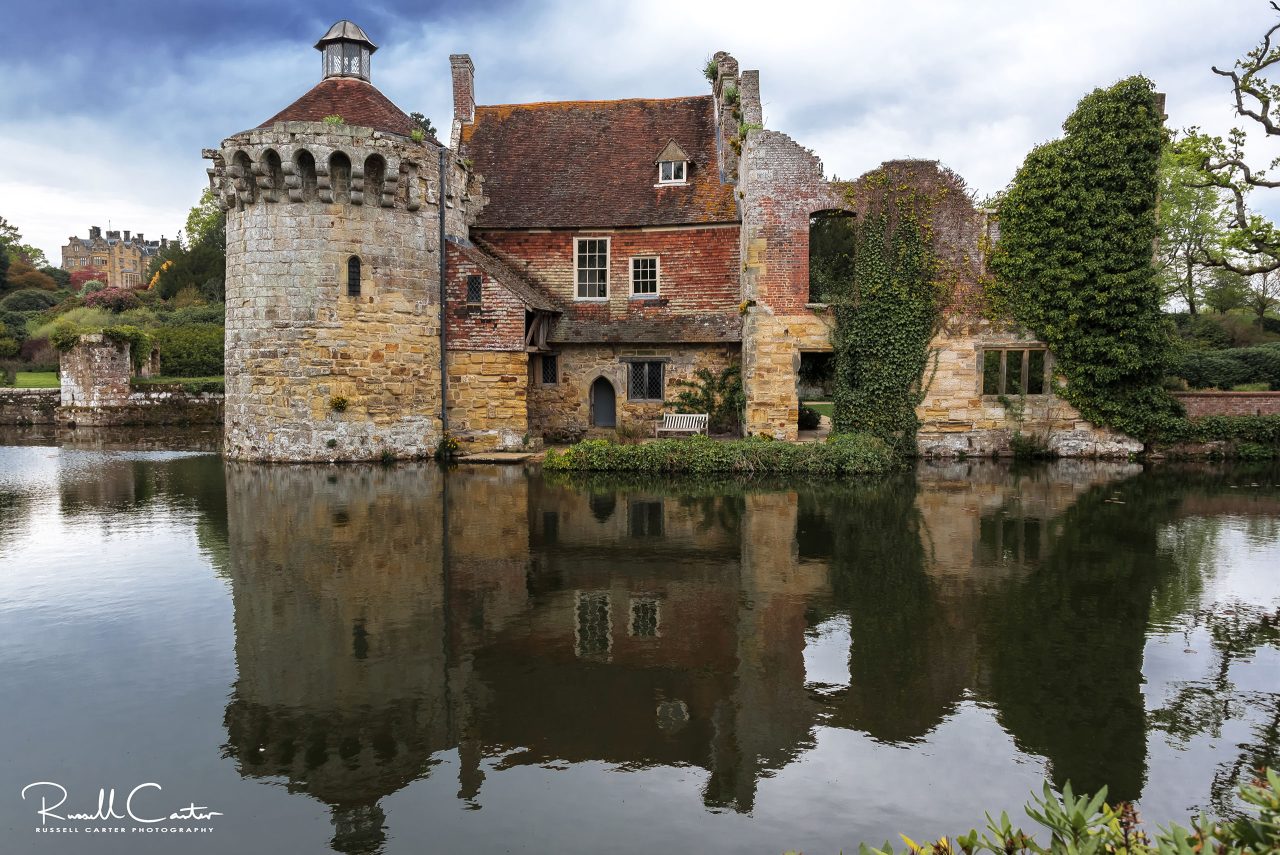
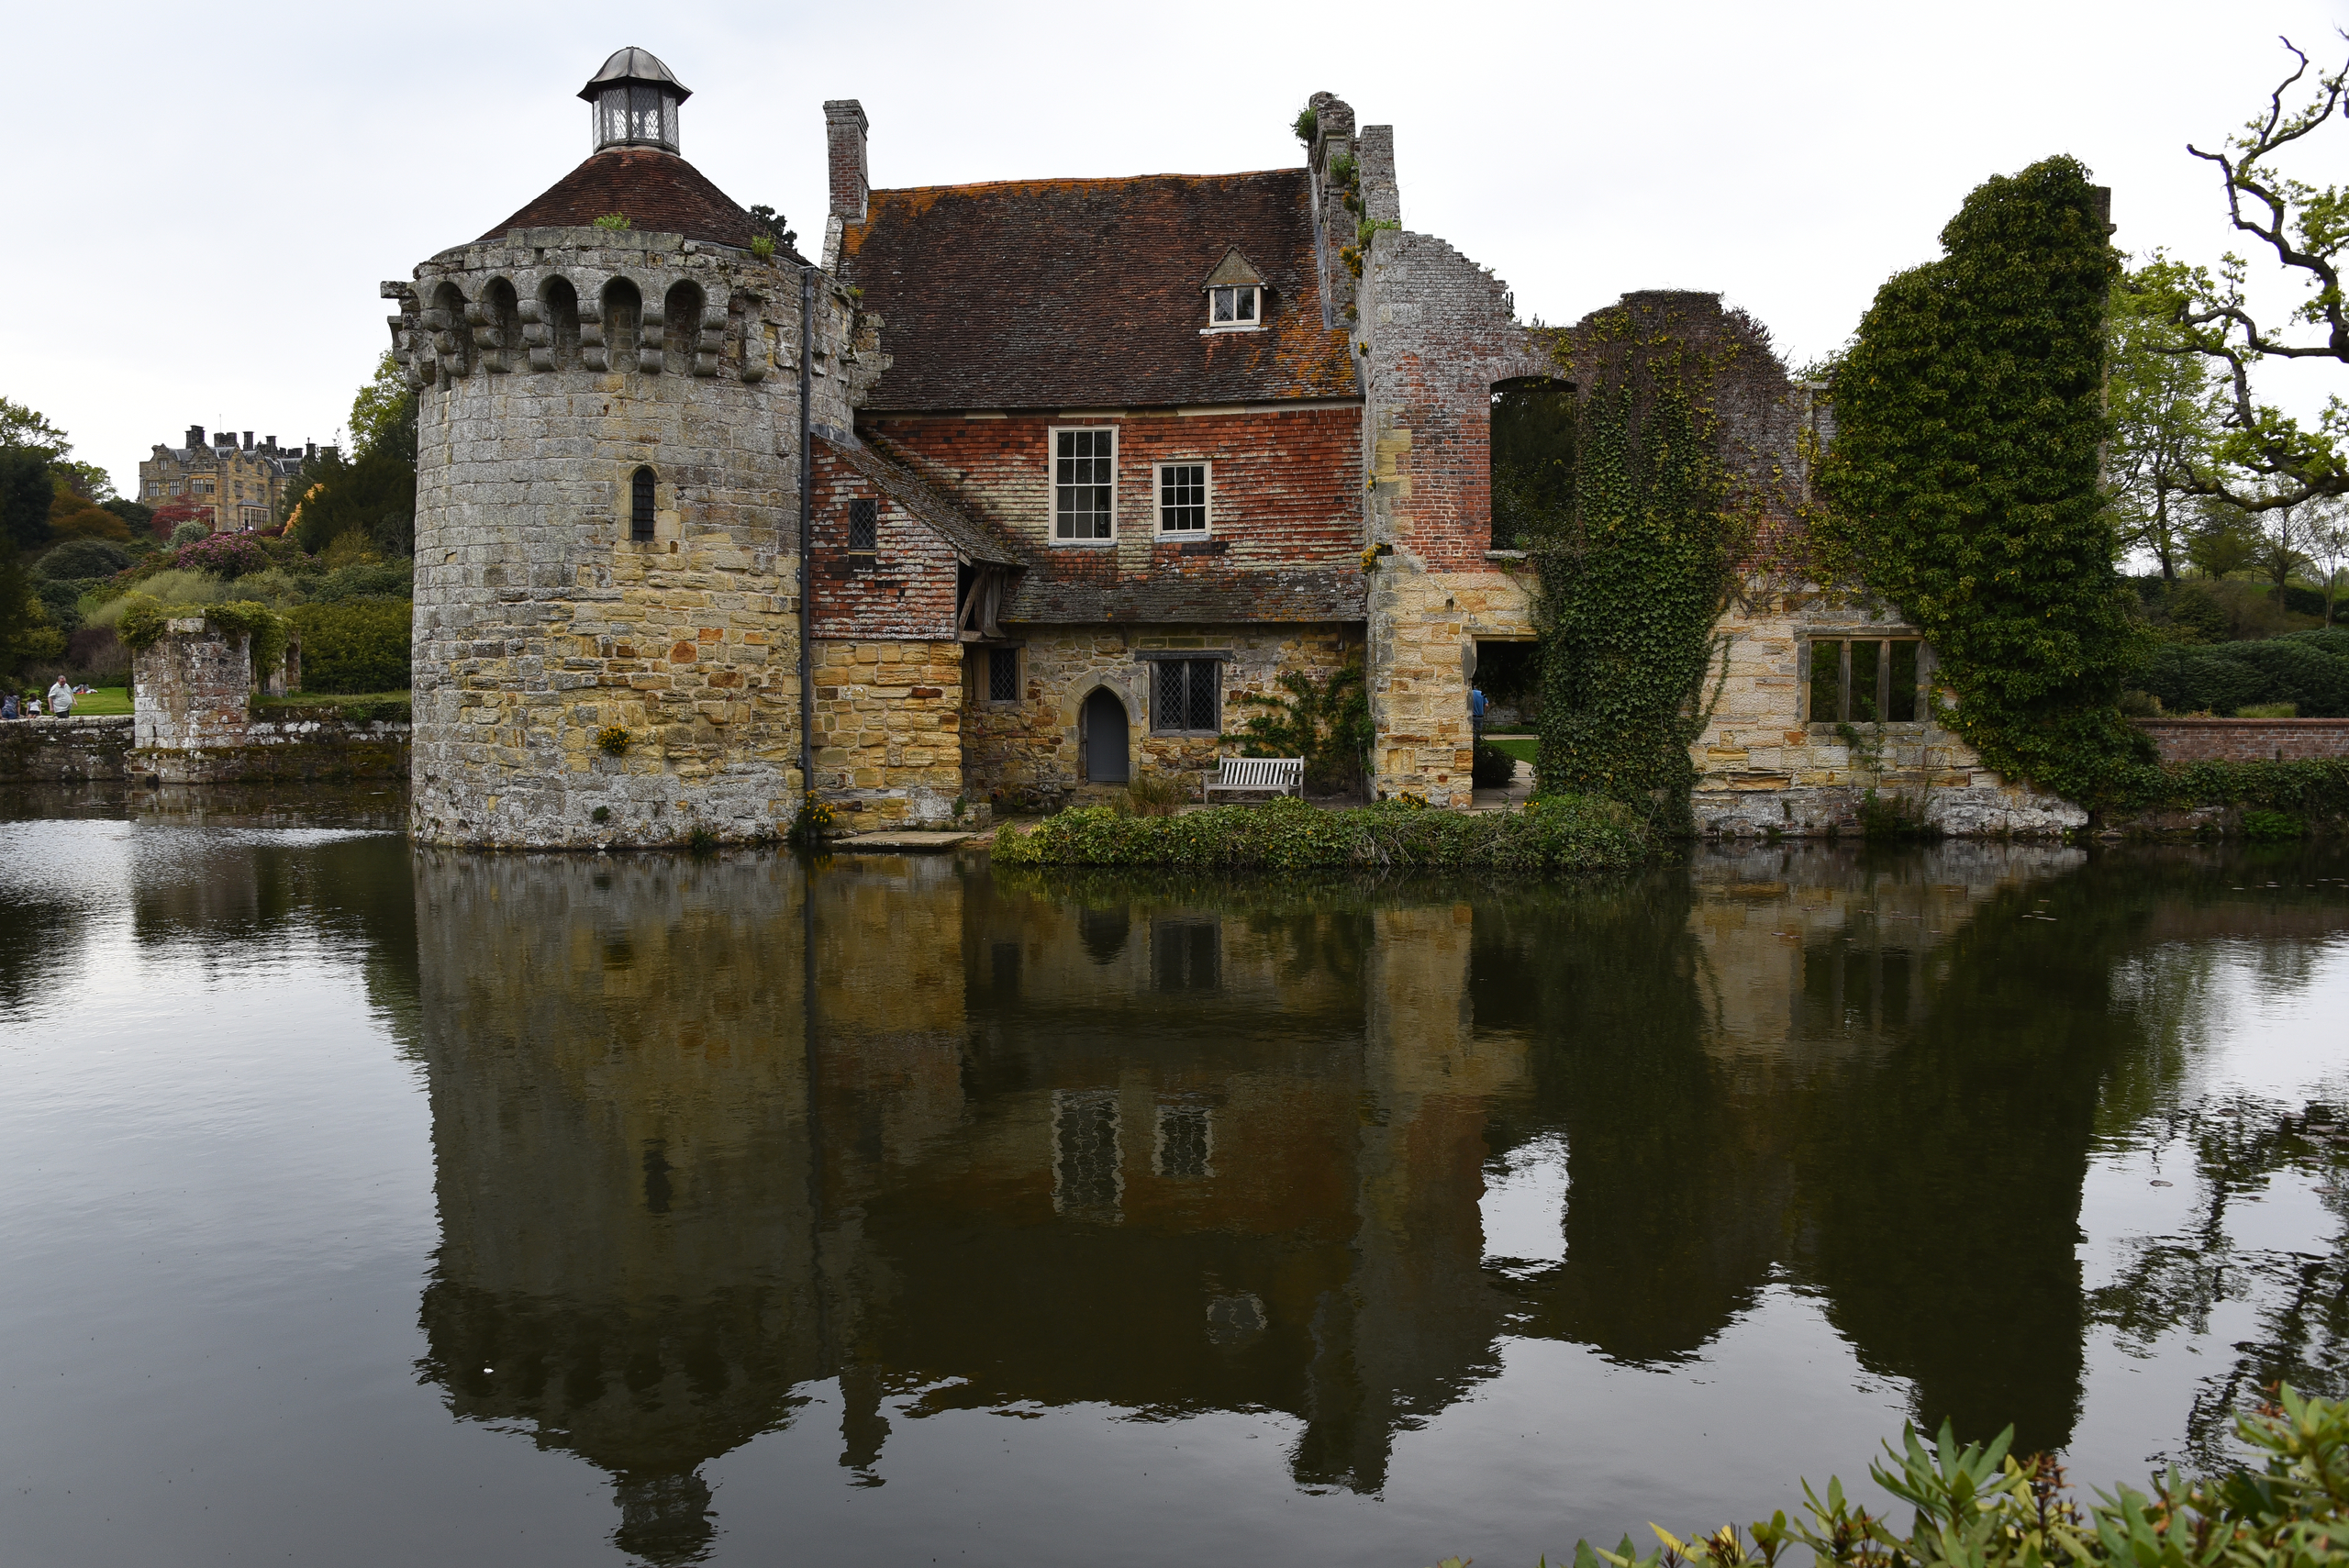
For photos that I do process, after basic adjustments like exposure, highlights, shadows, temperature, sharpening, and noise reduction, I usually go on to use other tools like the Selective Colour / Color tool (spelled differently in Photoshop and Affinity). I love this tool – it’s a powerful colour correction and enhancement feature that allows you to fine-tune the colours in your photos with a high degree of control. Rather than applying adjustments across the entire image, this tool enables you to target and modify the colours within specific colour ranges: reds, yellows, greens, cyans, blues, magentas, whites, neutrals, and blacks. You can therefore do things like reduce the cyan in the red channel or increase the magenta in the blue channel to give your sky a much richer colour. It’s just something I like and have grown used to.
Adjusting HSL (hue, saturation and luminance) is also a good way to adjust colours, but is not as granular or precise, and it’s more difficult to obtain the desired outcome. It should not be overlooked though, as it is quite powerful in its own right. The only editing applications I am aware of that have the Select Colour tool are Photoshop and Affinity Photo.
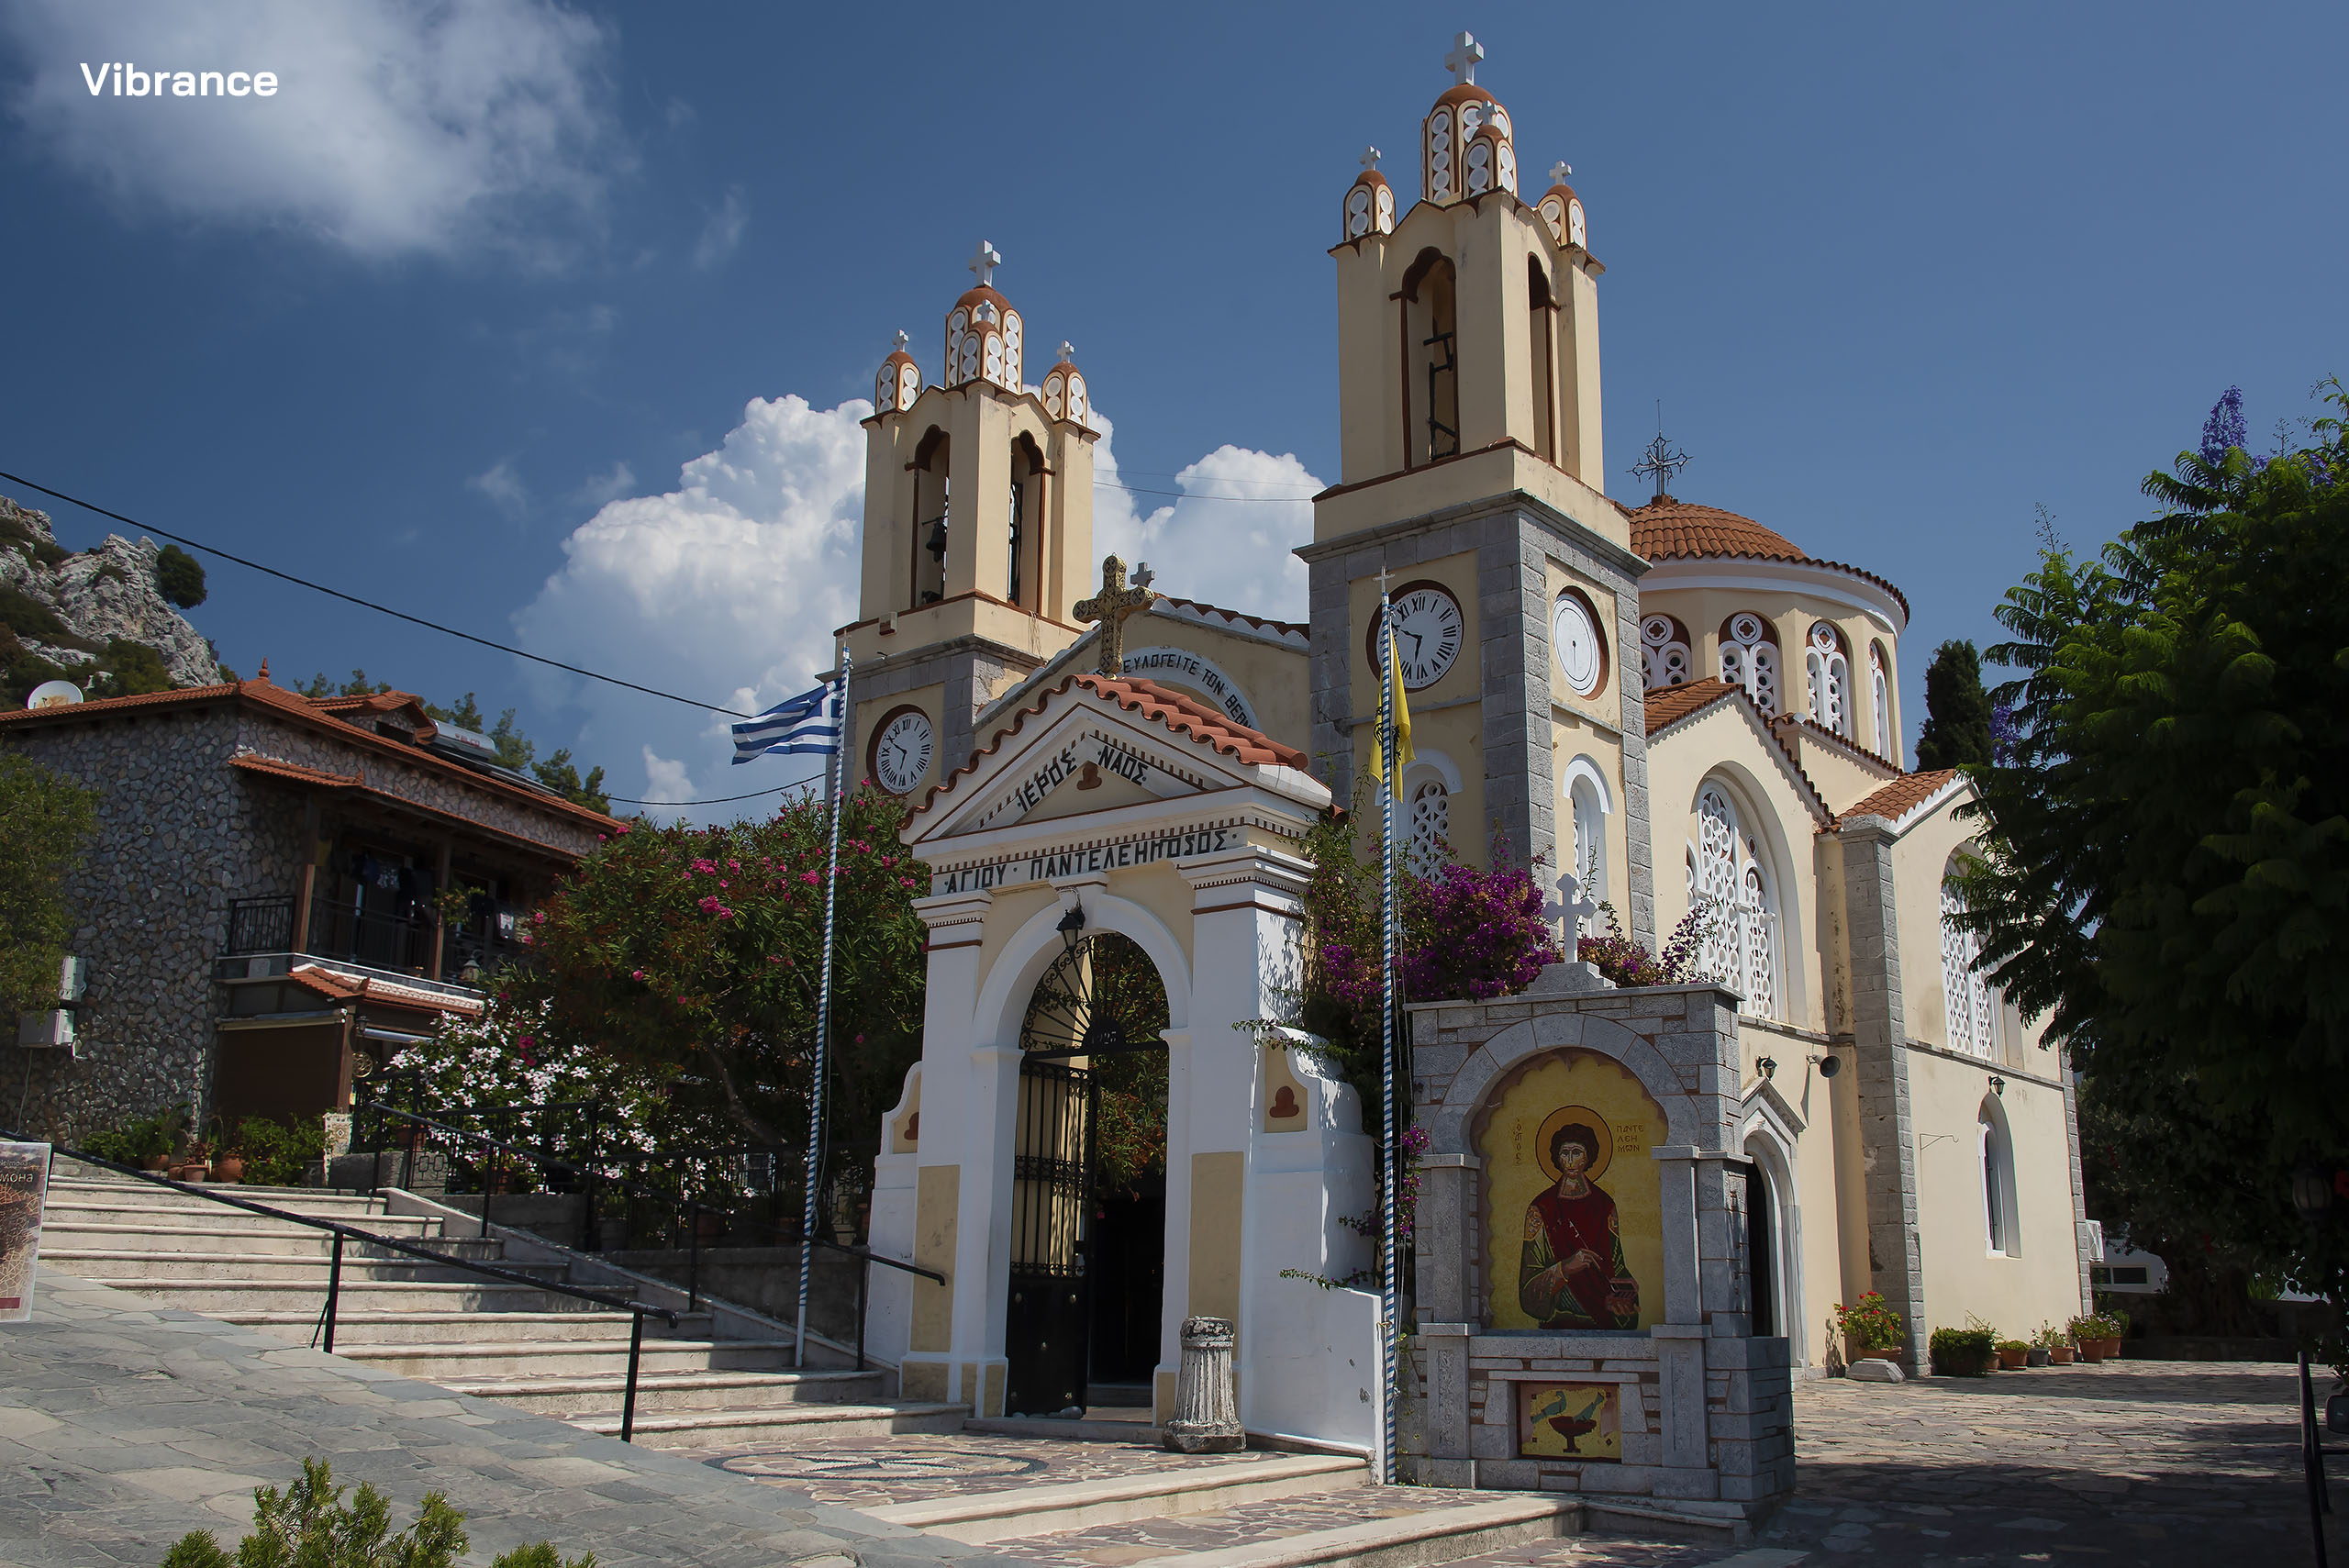
Here are some examples of images where I compare RAW, Selective Color, and Vibrance. No other changes have been made aside from lens correction, sharpening, and noise reduction:

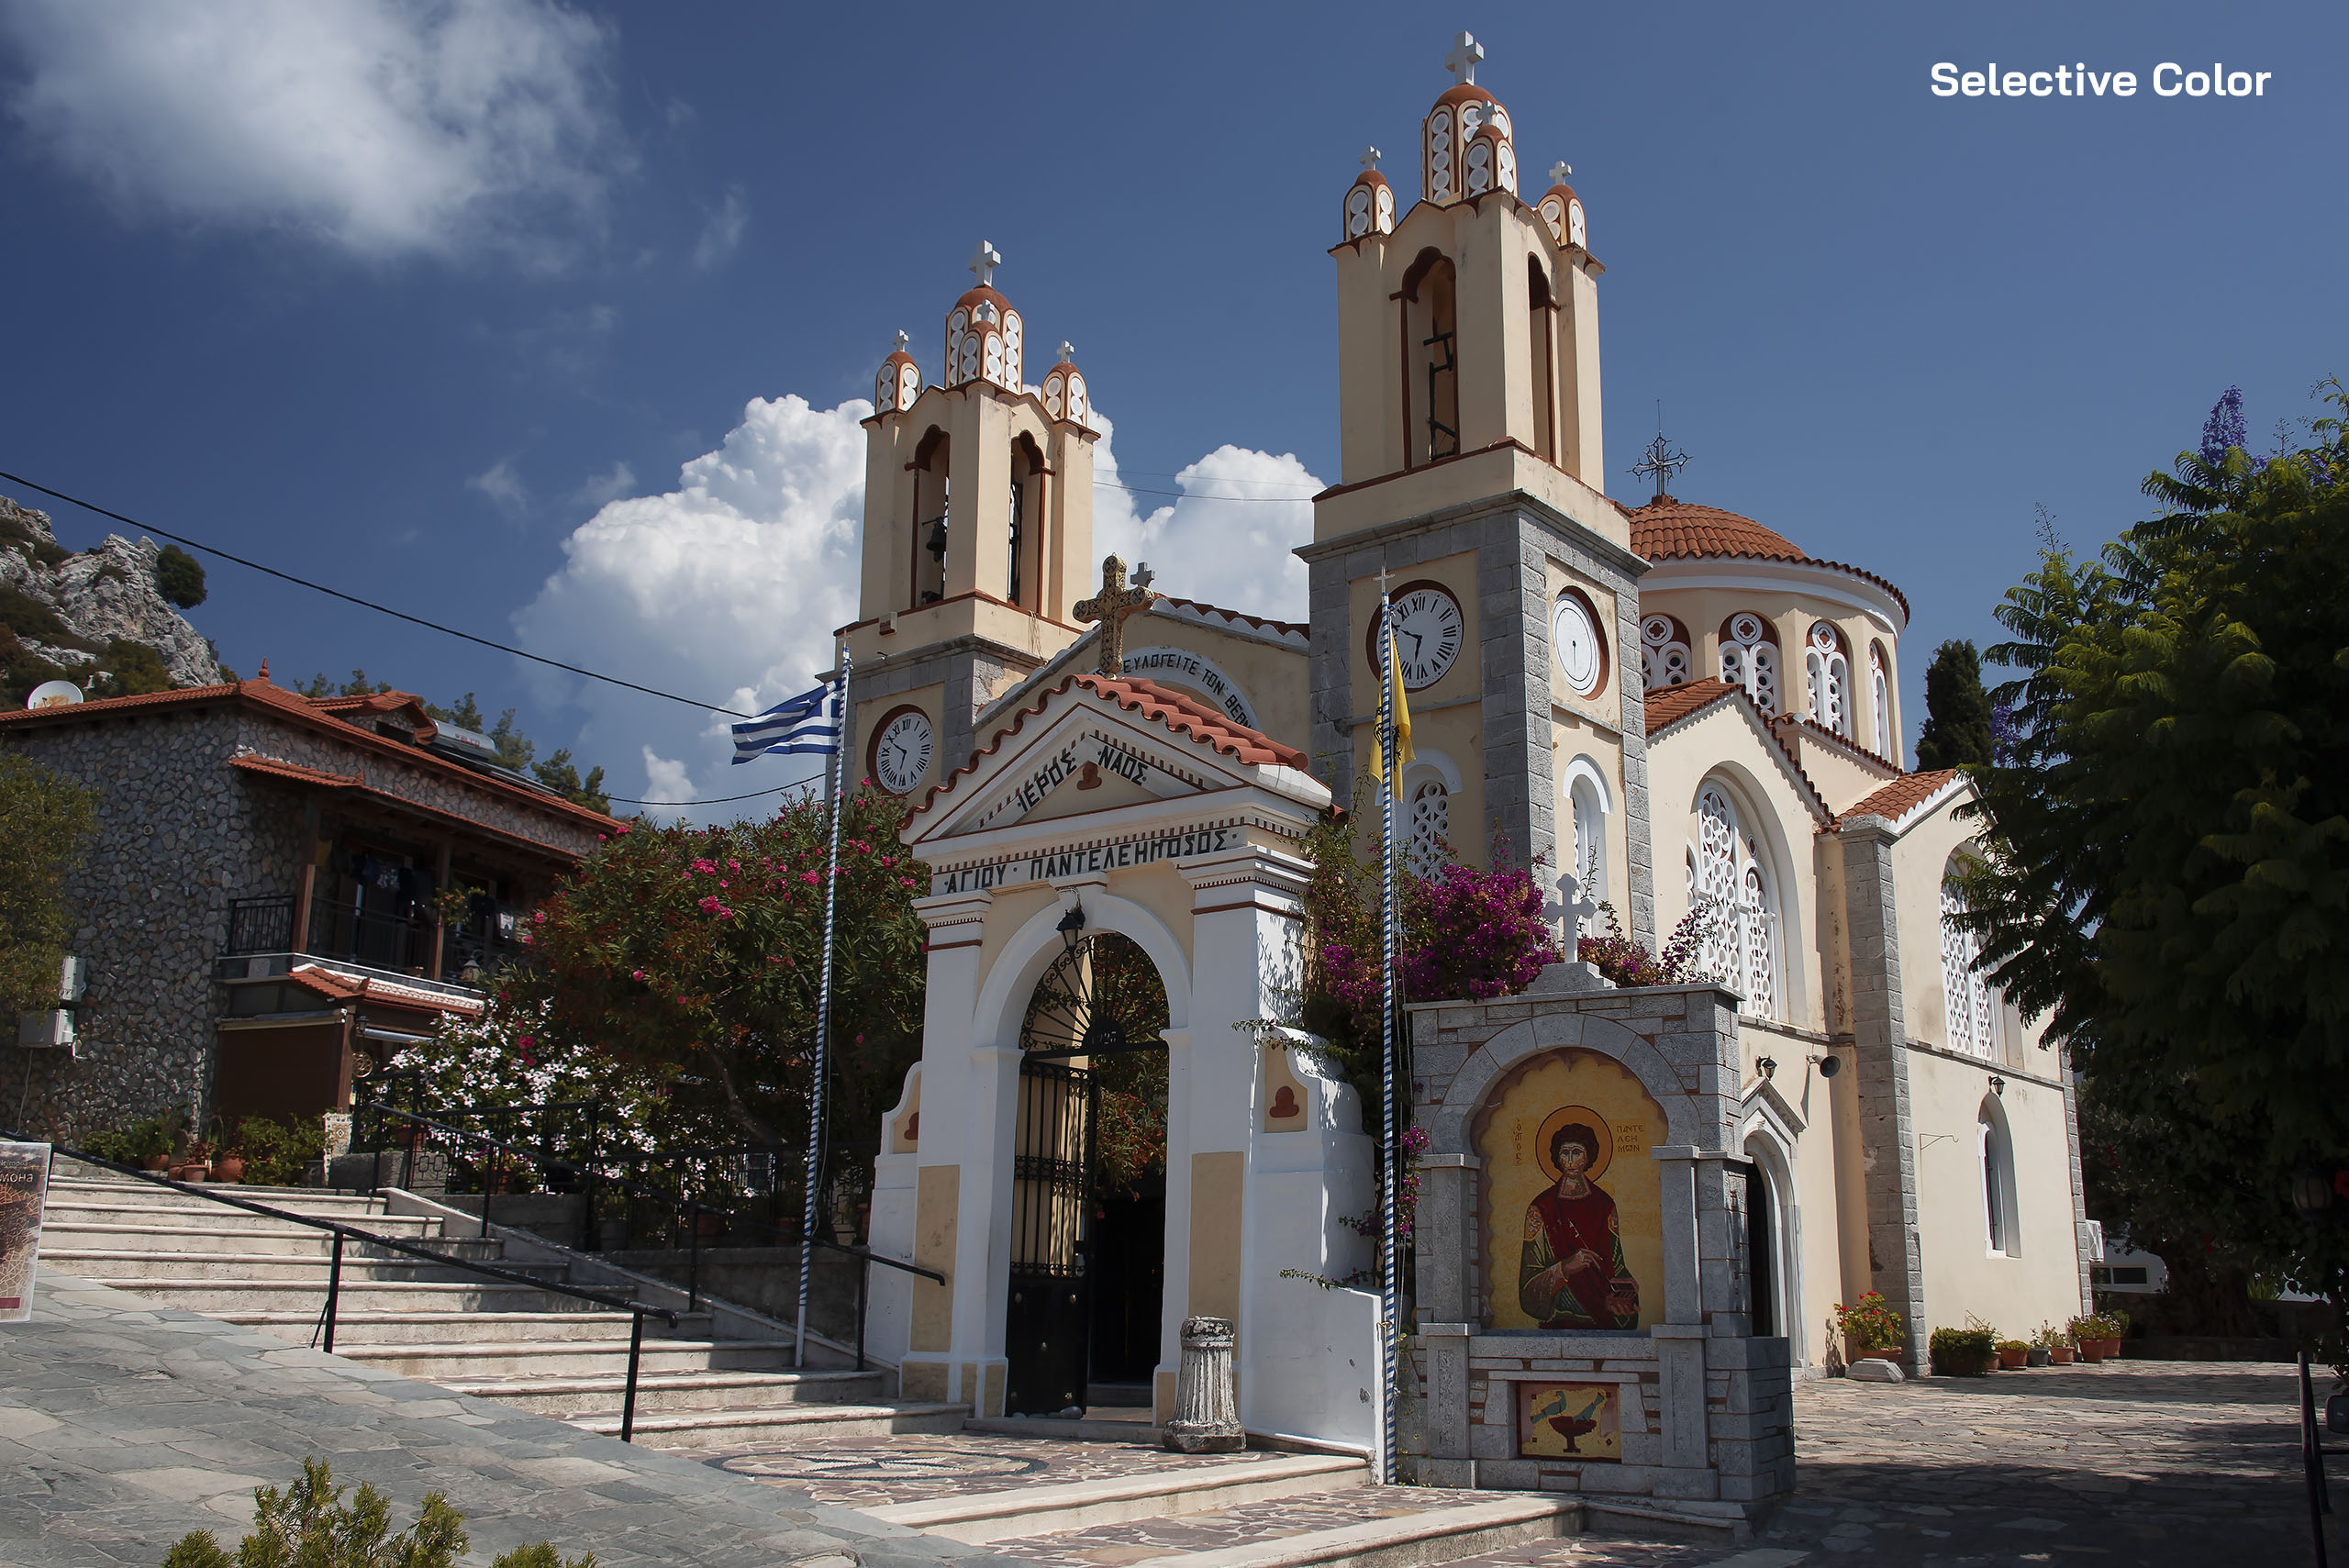
The colours in the RAW version appear noticeably muted and lack realism. Even after increasing Vibrance, the yellows still failed to reflect how they looked on the actual building.
Previously Used Software
Note: I use a Windows based PC and laptop only. While most of the software applications mentioned below should be available for the Mac, some aren’t.
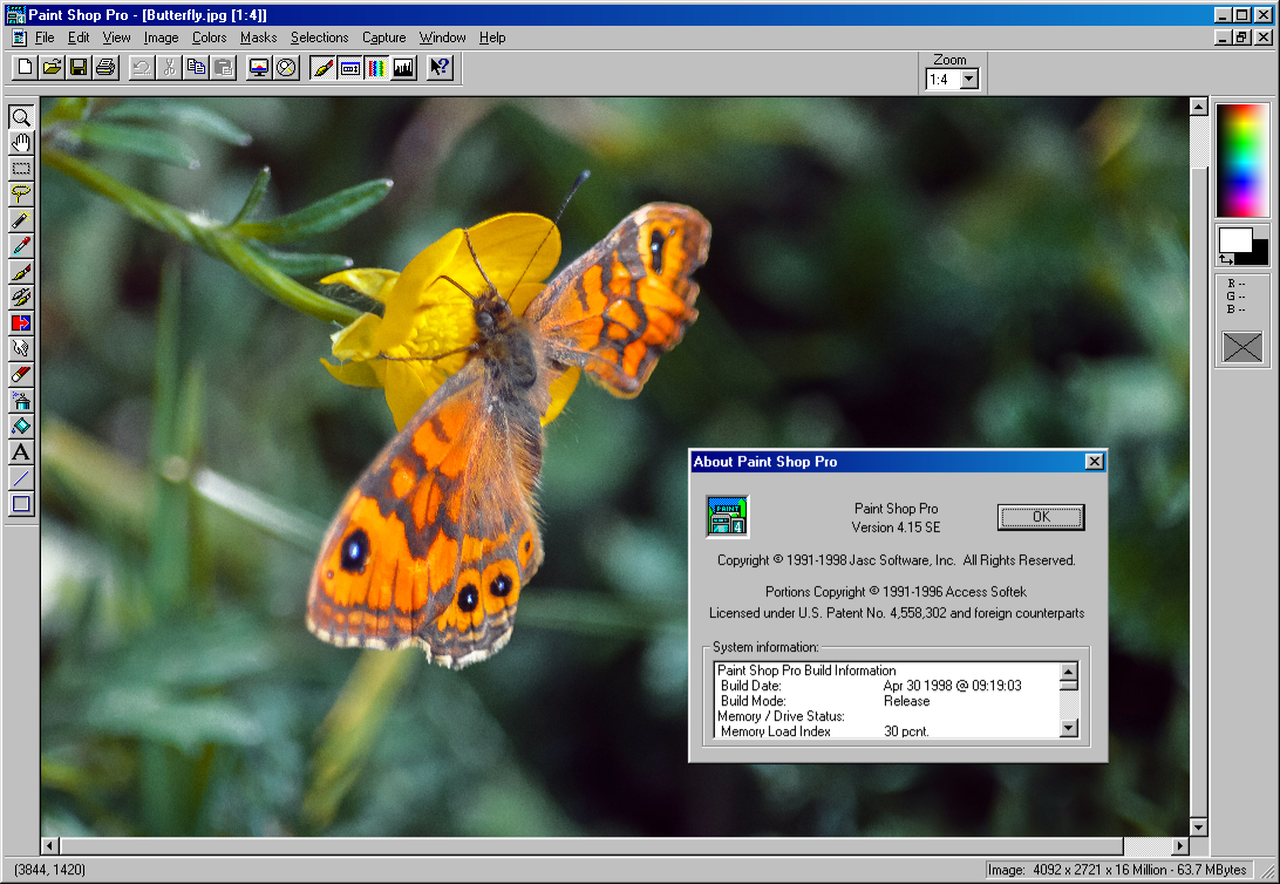
Paint Shop Pro 4
In 1996 I was introduced to Paint Shop Pro. It was great software for its time and could import directly from scanners – scanning items into the computer was quite a novelty back then! Since then, I have tried and used many image editors and photographic applications, including Corel Photo-Paint, ACDSee, Microsoft Picture Manager (I used that for a long time and liked it), PhotoShop and Lightroom.
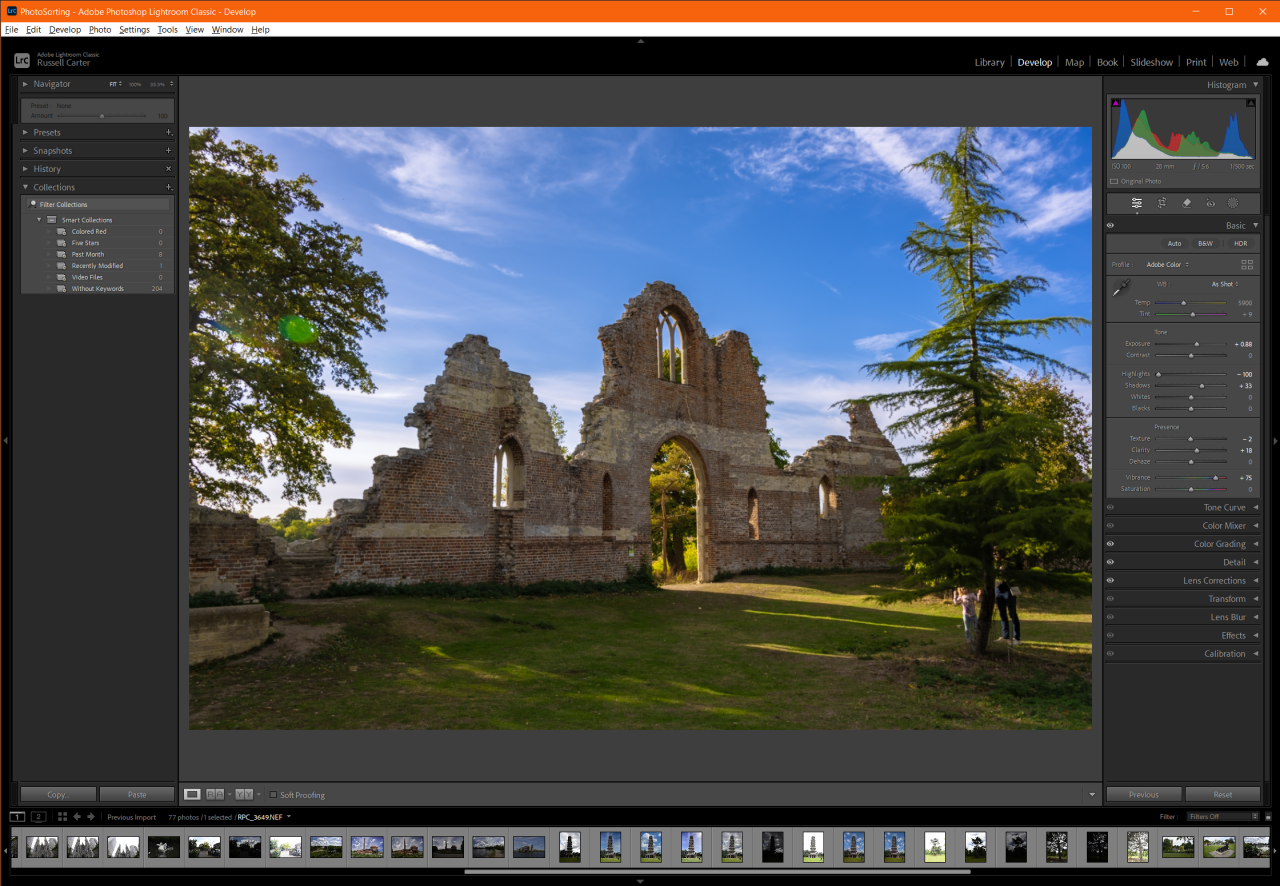
Adobe Lightroom & Photoshop
I previously had a subscription to the Adobe Photography plan, which bundled Photoshop, Lightroom, Camera Raw, and several other Adobe tools. However, since I only used the software occasionally, the cost-to-use ratio was very high, so I finally pulled the plug in July 2025.
In addition to that, they have put the prices up. If I take out a Photography plan now, I pay almost double what I paid previously and have to sign up for a minimum of one year!
I worked out that I have paid around £900 so far for the subscription since I took it out! Being a hobbyist I would never willingly pay anywhere near that much for software! I would certainly expect to own a version of it forever…
I’ve used Photoshop on and off for about 15 years and learned a lot, but I’m not an expert. It’s such a versatile tool that many of its features go way beyond photography.
Photoshop is ideal for photography because it offers precise, non-destructive control over retouching, tonal adjustments, compositing, and creative effects – all within a modular, layer-based workflow.

Lightroom on the other hand streamlines non-destructive editing, batch processing, and RAW image development with intuitive tools for exposure, colour, and organization – all optimized for speed and consistency across large photo sets.
Sounds great, except for the price tag!
Current Software
Note: I use a Windows based PC and laptop only. While most of the software applications mentioned below should be available for the Mac, some aren’t.
Before ditching Adobe (in July 2025), I embarked on a wider project to research photography related software applications to handle all of my updated workflow use cases. The following is a list of applications I chose not to use:
-
DxO PhotoLab
- DxO is primarily for sharpening and noise reduction, but what put me off is that you can only observe the changes applied at 75% zoom level and above. I won’t consider using this software until that is ‘fixed’. It also does not contain all of the editing tools I would need, e.g. Retouching, Layers, Effects, etc, so it’s a niche product.
-
Capture One
- Too expensive for me right now, but it looks like one of the best photo processing applications outside of the Adobe ecosystem.
-
Topaz Gigapixel
- Relatively expensive, considering I get ON1 Resize AI as part of ON1 Photo RAW. I could not get a goose to look as good in Gigapixel 8 as I did in ON1 Resize AI. There are a lot of options though, and I have not had the time to explore them all yet.
-
Upscayl (Free)
- This works well, better than simple image resizing, but the results are nowhere near as good as ON1 Resize AI.
-
IrfanView Viewer (Free)
- I tried IrfanView, but the user interface is too simple. It has no browser pane, and the preview and thumbnail windows are separate, with the latter not opening by default.
-
Darktable / Raw Therapee / ART (Free)
- These applications are incredibly powerful, but their steep learning curve prevents me from integrating them into my workflow. Raw Therapee is one of those applications that feels like it’s built for people who already know how to use it. 😄 I generally prefer more intuitive user interfaces. ART, a fork of Raw Therapee, was developed to streamline the user interface while preserving the high-quality adjustment capabilities. I haven’t spent much time with either yet, but I plan to give ART a try if I run into trouble fine-tuning something in one of the other editors.
-
EasyHDR / Luminance HDR
- While Luminance HDR offers a deep, free toolkit and EasyHDR has a refined interface, neither matched Luminar Neo’s ability to deliver high-quality HDR results as quickly or effortlessly. Luminar Neo delivers excellent output with its modern AI engine, but it lacks the granular HDR controls that Aurora HDR offered. While Aurora HDR is no longer updated, it remains unmatched for manual bracket merging, al though Neo’s HDR Merge extension narrows that gap.
-
ACDSee Photo Studio Ultimate
- ACDSee is very similar to ON1 Photo RAW in that they are both all-in-one photo editing platforms that combine RAW processing, layer-based editing, and digital asset management (DAM) into a single ecosystem. ON1 however leans more toward a modern, modular interface; has invested heavily in AI masking, noise reduction, and sky replacement; and has a larger preset marketplace and more frequent updates geared toward creative workflows.
-
Paint Shop Pro 2023
- Paint Shop Pro 2023 offers a fully comprehensive set of editing tools once you move beyond the beginner-oriented scaffolding. While it shares some similarities with Photoshop and Affinity Photo, its workflow and interface feel too different for my needs, and some features are not as advanced as Affinity Photo or Photoshop. Since I already use Affinity Photo, I don’t see myself adopting it.
The following are applications I currently do use:
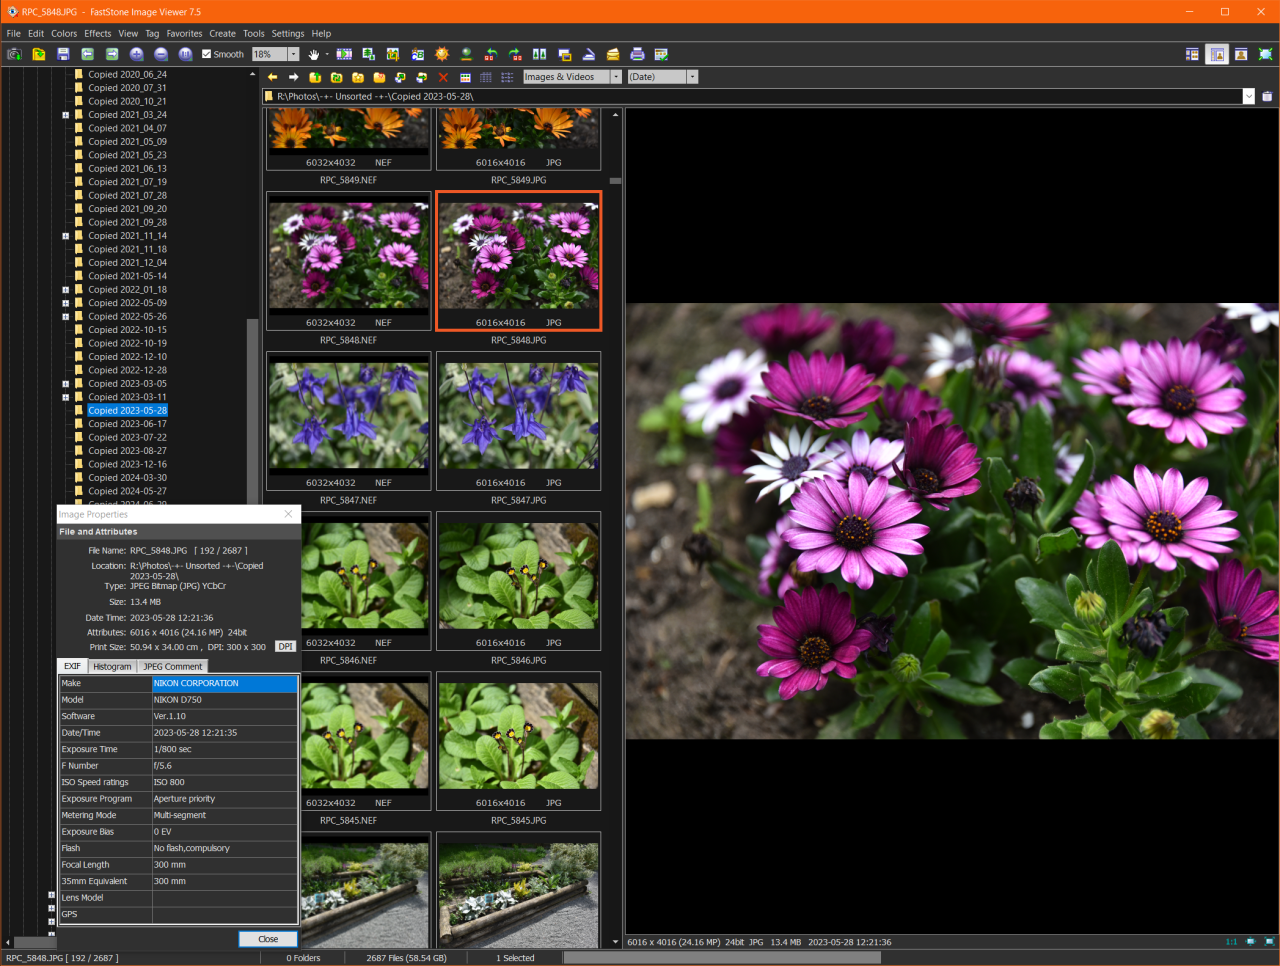
FastStone Image Viewer (Free for home use)
I have been using FastStone for many years now. It’s a free lightweight yet surprisingly capable image browser and basic editor that is great for speed and simplicity, and it’s my default application for viewing images. When opening an image, you can choose how it’s displayed – either in full screen, windowed mode, or browser view. The browser view includes an explorer pane for navigation, a thumbnail pane for quick previews, and a larger preview area for detailed inspection. Metadata is displayed in a separate window. Zooming and panning are handled by the mouse alone – no modifier keys. It offers quick precise cropping and rotating, initiated by keyboard shortcuts. Sadly (as of version 8.1) it does not handle video that well though.
FastStone features I like:
- Favourite Folders Menu
- Cropping
- Rotation
- Side-by-side Image Comparison
- Filtering and Sorting (persistent extension filter)
- Dual Monitor Viewing (browser and thumbnails on one, full screen viewer on another)
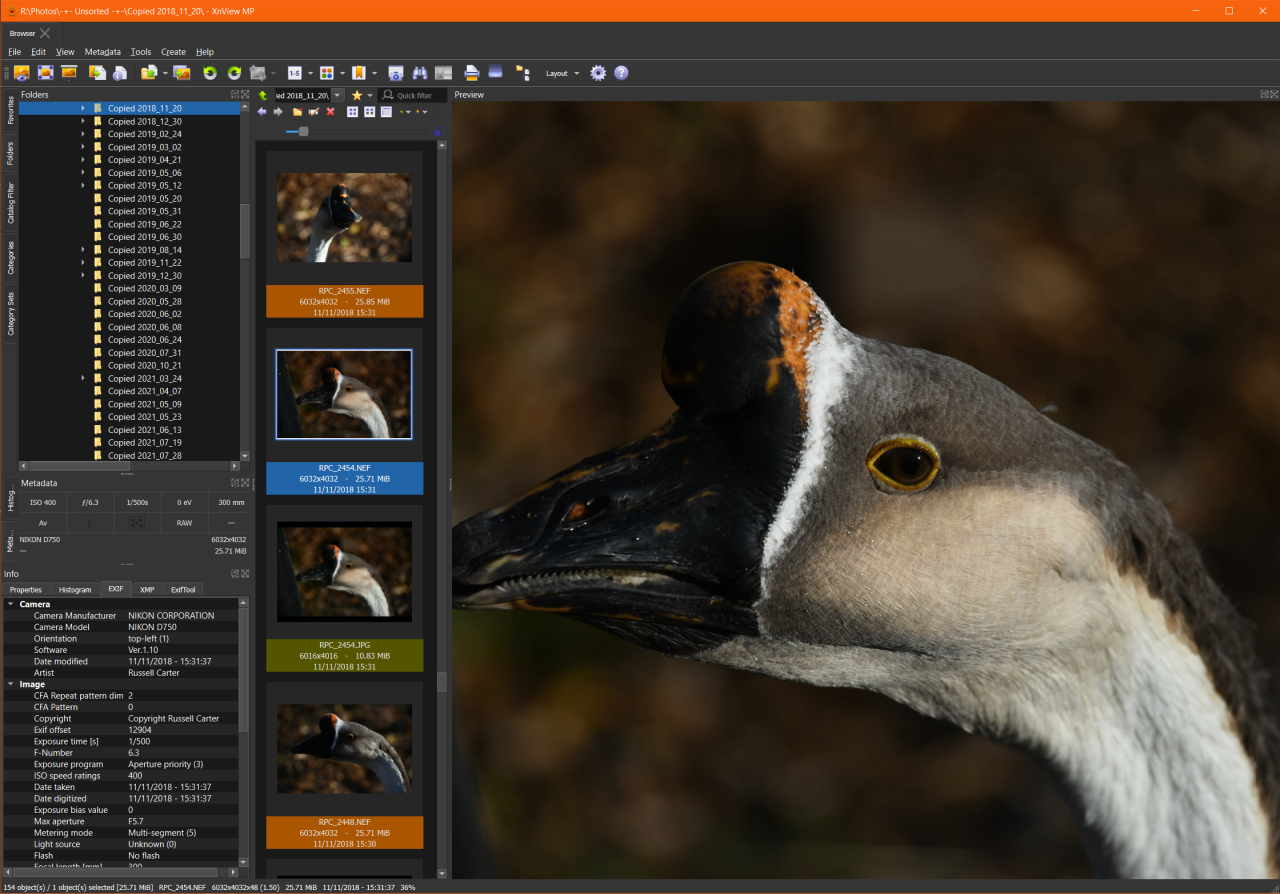
XnView MP (Free)
XnView MP is another great lightweight free tool, but is more configurable, and therefore more complex. It offers deeper metadata control, layout flexibility, image rating, and better video handling than FastStone.
Affinity Photo
This was the big one for me. Having used Photoshop for so long, I was reluctant to switch to any other application. Any replacement needed to offer a comparable interface and robust capabilities for advanced, layer-based editing. Then I discovered Affinity Photo! After trialling it, I found that despite some user interface differences and a few tools being named differently, I can accomplish what I need without relearning everything from scratch – the interface feels familiar enough. While I can’t directly compare its tool quality to Photoshop, Affinity appears to offer everything I need. The only filter I regularly use in Photoshop that’s missing is Smart Sharpen – but Unsharp Mask performs well enough for my needs, and I have other software that can sharpen photos. And I actually found a few features I like better than Photoshop!
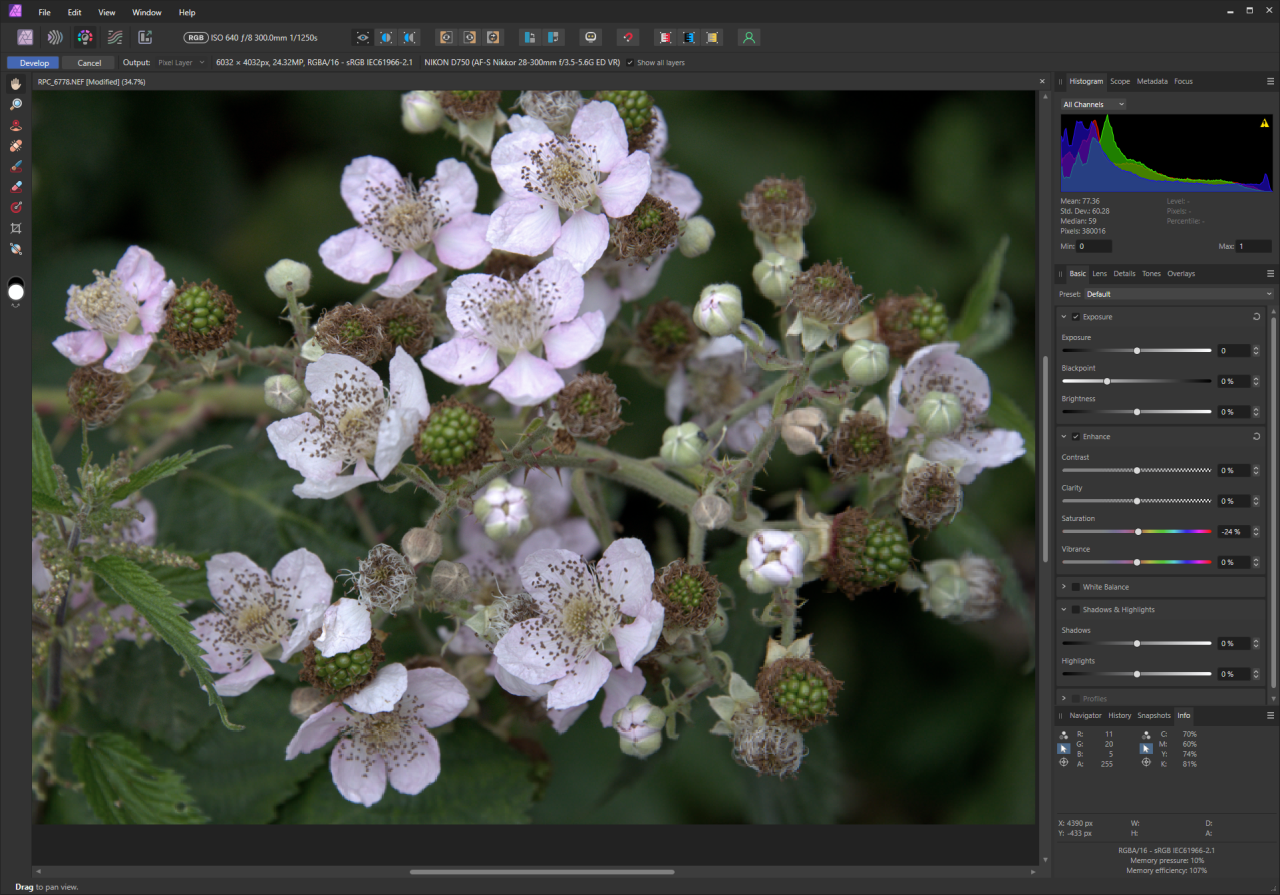
Affinity has a ‘Develop’ persona equivalent to Camera RAW in Photoshop:
The ‘Photo’ persona is where you carry out layer-based editing:
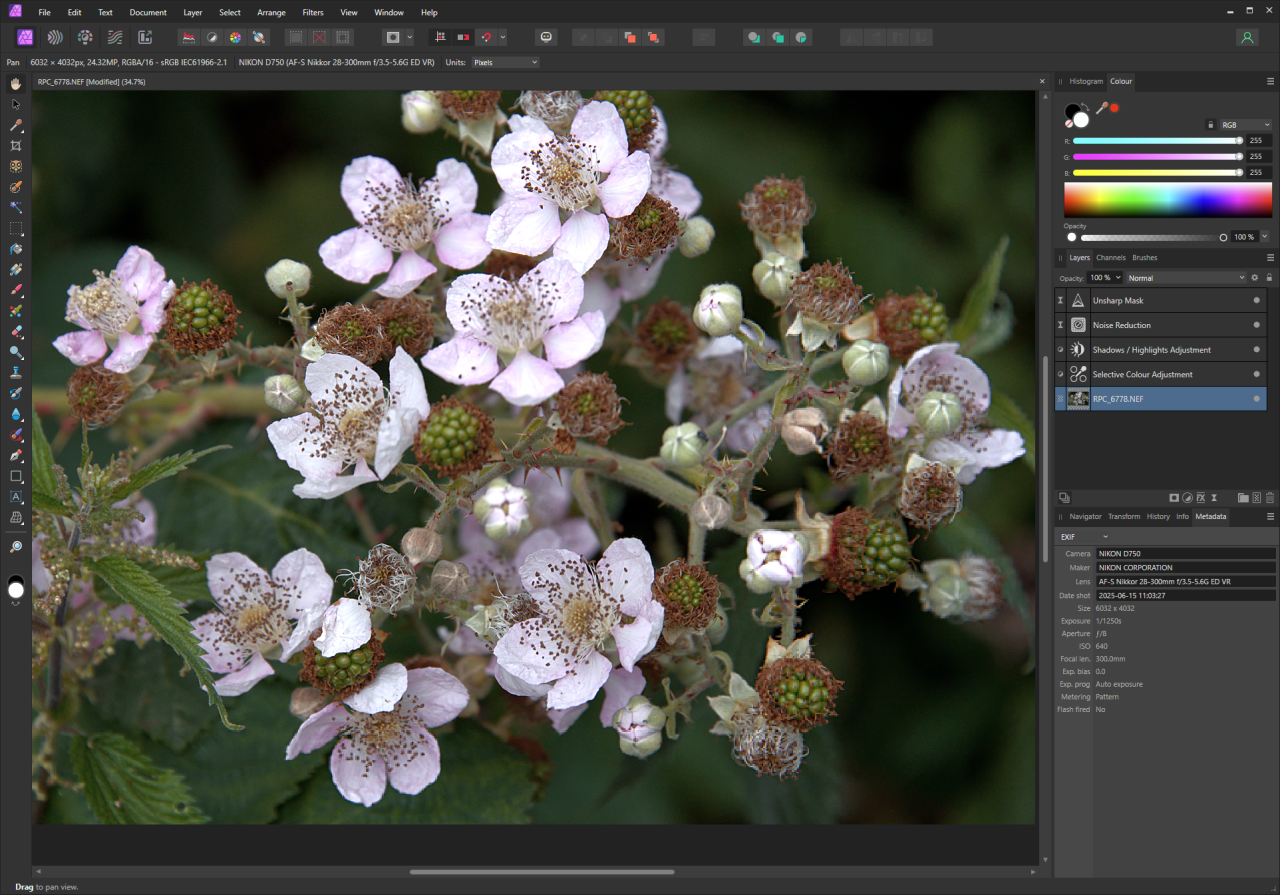
Affinity also has ‘Liquify’, ‘Tone Mapping’ and ‘Export’ Personas.
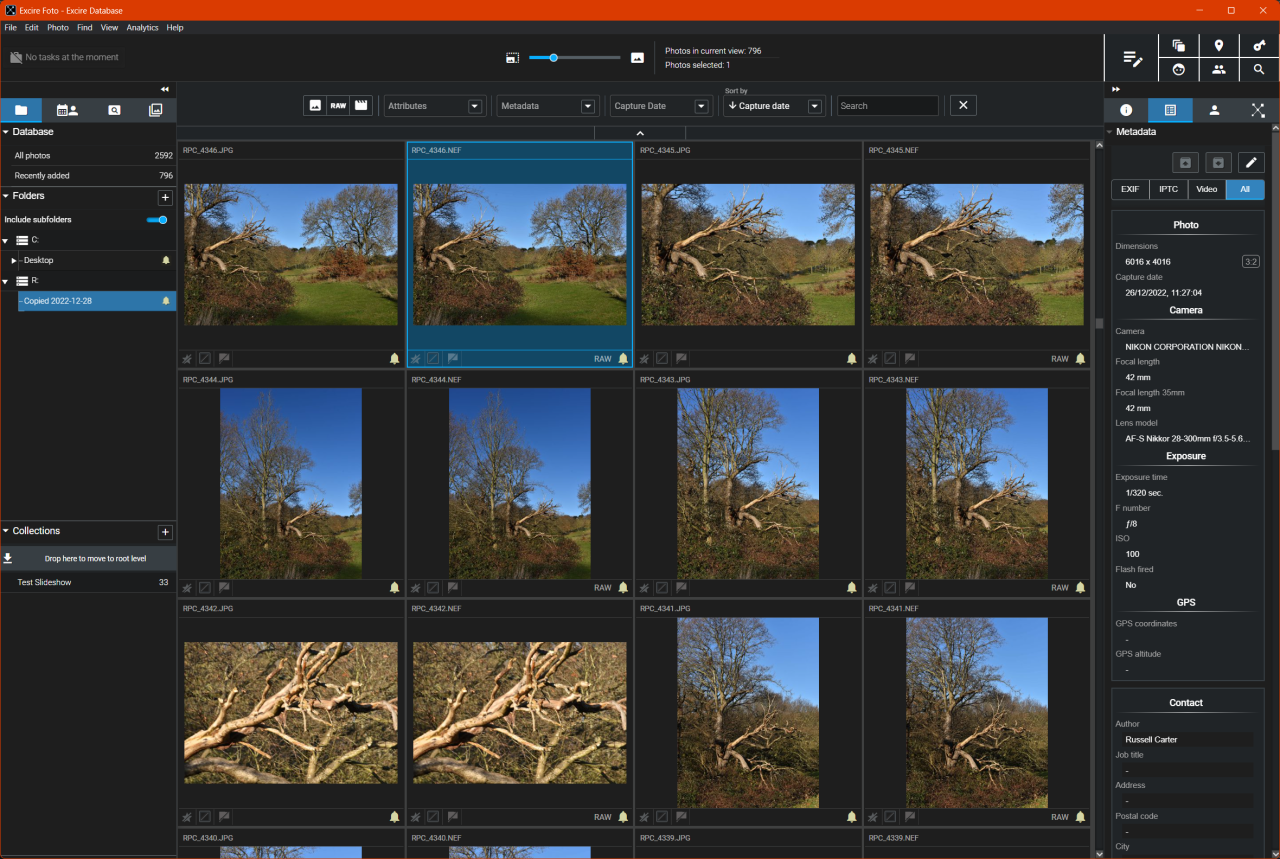
Excire Foto
Excire Foto is one of the top-tier contenders for AI-powered search, keywording, and face recognition, and I like it’s simple yet powerful interface.
It combines multiple AI engines to streamline photo organization by automatically tagging images with relevant keywords, identifying faces with improved accuracy, evaluating aesthetic quality for culling or portfolio selection, and enabling powerful free-text and GPS-based searches – all within a clean, intuitive interface designed to handle large photo libraries efficiently.
One of my goals is to host my personal photo albums on PhotoPrism, which I have running in a docker container on my Raspberry PI Server.
Although PhotoPrism includes its own AI keywording capabilities, I’m looking for a tool that gives me full control—one that allows manual editing of keywords and face tags in addition to AI, lets me assign or adjust GPS coordinates, and supports local cataloguing of my entire photo archive. In that regard, Excire offers more advanced AI keywording and facial recognition, making it a good fit for my workflow. Excire has other features that will benefit my workflow.
Also, once my entire archive is catalogued, I can make use of the free-text search powered by its X-prompt AI, allowing me to locate images using natural language queries like “sunset over mountains with a lake” or “laughing child at birthday party.”
There are some downsides, but they hardly take away from how impressive the software is overall:
- It does not store face data in files.
- A workaround for this is to assign keywords with the person’s name.
- It uses a proprietary database, and you cannot connect to it. Custom SQL queries give me visibility of the metadata and keywords across all files.
- After writing metadata to files, I can always import into digiKam and access it’s database.
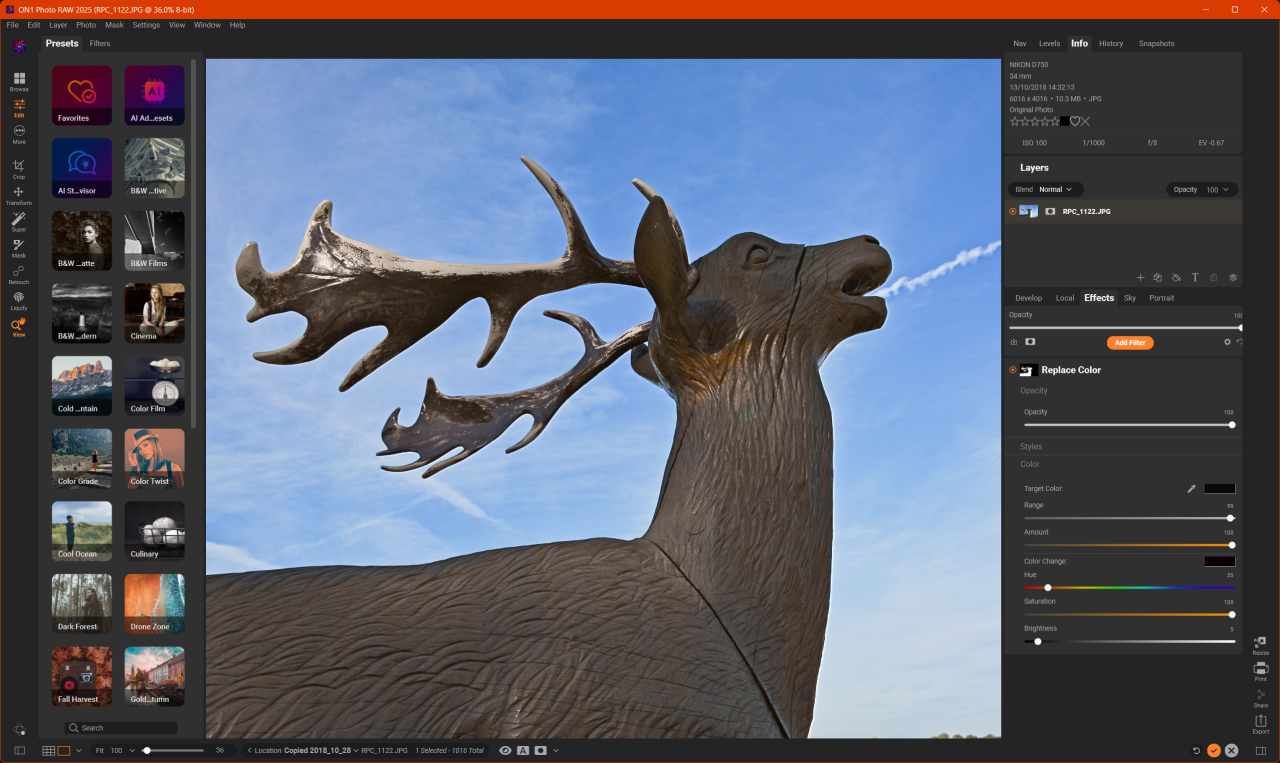
ON1 Photo RAW
ON1 Photo RAW offers a comprehensive solution by combining powerful photo cataloguing with a full-featured editing suite in a single, integrated platform. It’s surprisingly affordable as well!
ON1 Photo RAW combines non-destructive RAW processing with advanced features like AI-powered masking, Super Select AI for targeted adjustments, NoNoise AI for intelligent noise reduction, Resize AI for high-quality enlargements, AI Sky swap, AI Portrait with face enhancements, and a full suite of effects, layers, HDR merging, panorama stitching, and focus stacking – all wrapped in a customizable interface.
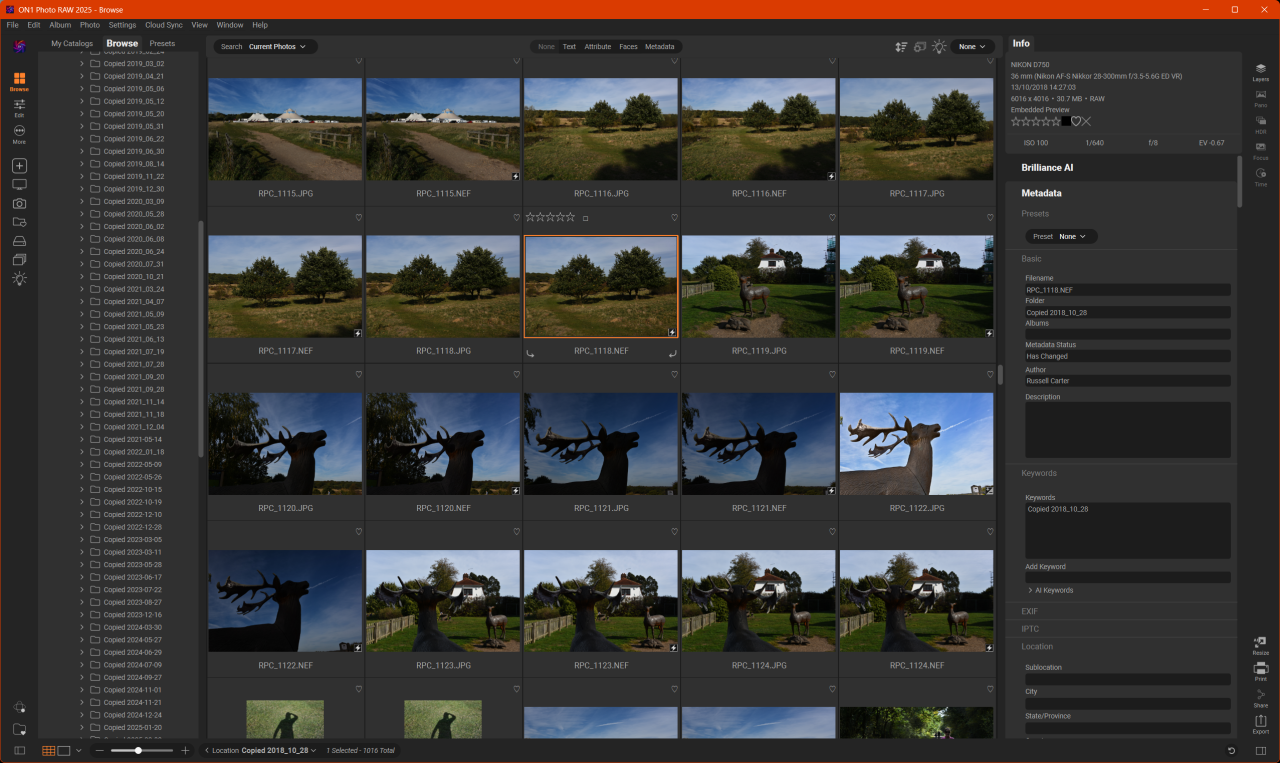
When choosing filters, it presents you with a list of objects found in the photo which you can check to create an instant mask for the selected filter!
Other things I like about ON1 is the strong community, the helpful video tutorials, and the emails that offer tips for various features.
I was blown away by what the Resize AI function did to a cropped photo of a goose! Take a look, this is the original image showing the cropped section:
The size of the cropped section is 1036×691 pixels. I set the new size at 6000×4003 pixels and used the better quality model. Here is a side-by-side comparison:
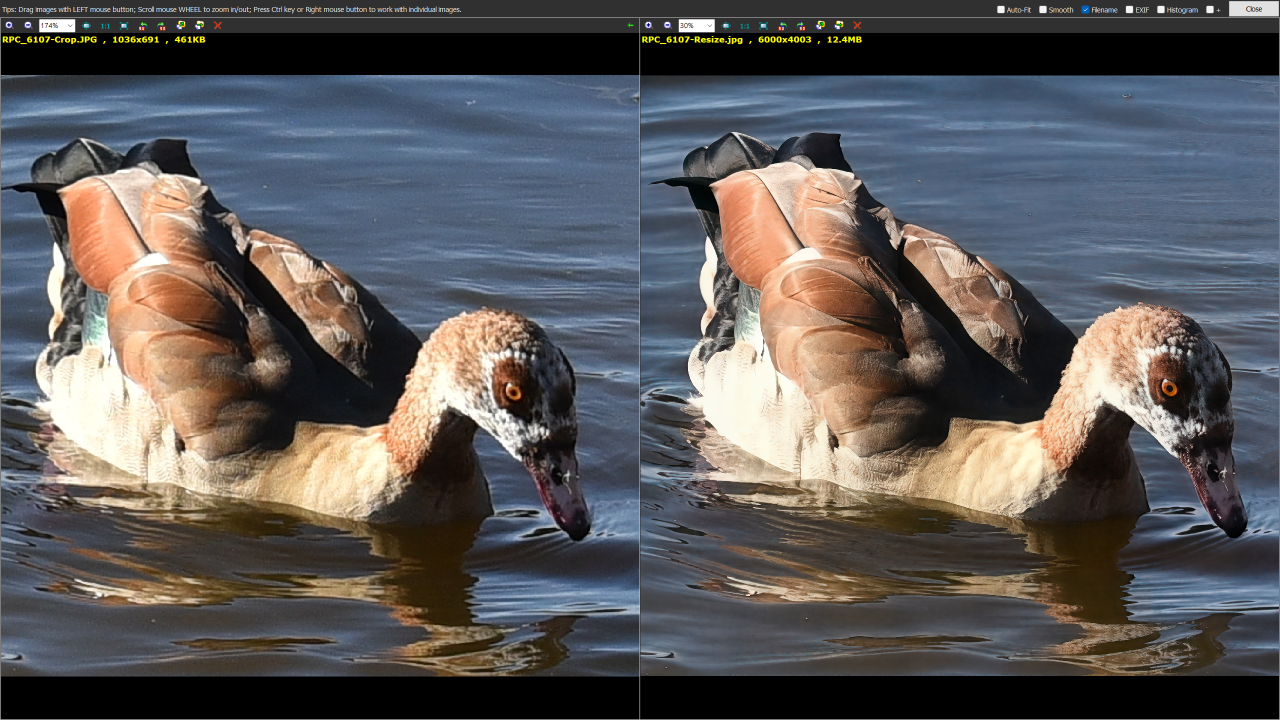
And here is a close-up of the head:
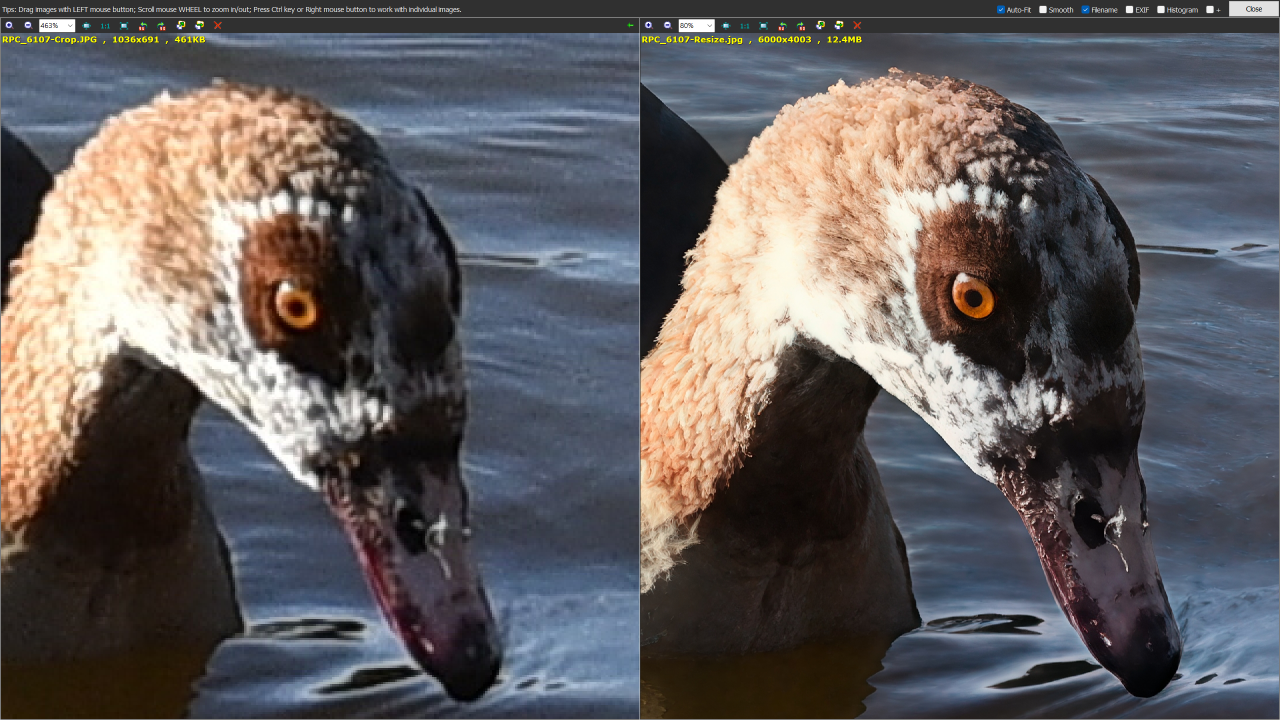
That’s impressive – it’s as if I just zoomed in with a telephoto lens! It’s important to note though that this is an upscaling function – it won’t have any effect unless the new dimensions are set larger than the original image. It’s not designed for simple sharpening, and it tends to perform poorly on vintage scanned film photos. This is because the AI is trained to enhance recognizable patterns found in modern digital images, which low-resolution scans often lack.
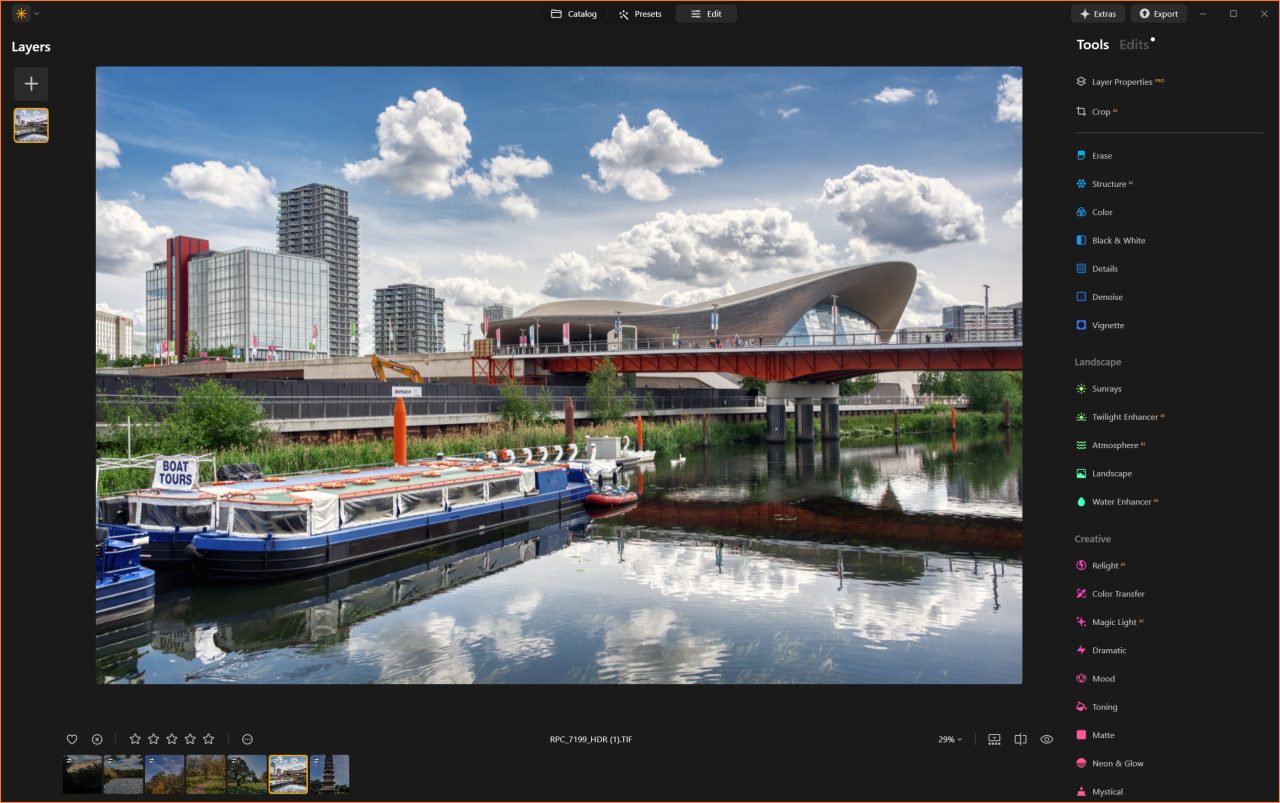
Luminar Neo
Luminar Neo is a powerful, AI-enhanced photo editing platform that combines intuitive controls with advanced tools, with a deceptively simple user interface.
It streamlines complex editing tasks that would typically require multiple layers, masks, and adjustment stacks in Photoshop – offering intuitive, slider-based tools that let you achieve professional effects like relighting, structure enhancement, and sky replacement in just a few clicks, without sacrificing creative control.
I use it primarily for HDR merging and panorama stitching – Luminar Neo incorporates the acclaimed Aurora HDR application that existed as a standalone product until 2019, and it appears to excel at panorama stitching. I have Hugin to fall back on for more challenging stitching.
See the Shooting section for insight into how I create exposure bracketed photos.
Topaz Photo AI
Topaz Photo AI is a desktop photo enhancement suite that uses advanced machine learning to automatically detect and fix issues like noise, blur, low resolution, and facial softness, with just a few clicks. It combines the power of Topaz Labs’ former standalone tools (Gigapixel AI, Sharpen AI, and Denoise AI) into one streamlined interface, and produces high-quality results without diving into complex manual adjustments.
I tested it on a batch of old photos I’d scanned from family albums my mother left us, and the results were amazing! The results are far beyond anything I could do myself with Photoshop. This tool is going to be incredibly useful for restoring and enhancing those cherished images with minimal effort.
Hugin (Free)
Up until recently I have been using Hugin for panorama stitching. Its advanced capabilities include the ability to manually set control points, though this is rarely necessary thanks to its robust automatic detection algorithm which handles most image alignments effectively. As my skill in capturing well-overlapping images has improved over time (see how I do this in the Panoramas section), I’ve found myself relying on manual adjustments far less frequently.
Hugin intelligently balances exposure differences between overlapping frames using control point alignment and advanced blending algorithms, resulting in a seamless, unified panorama without visible transitions.
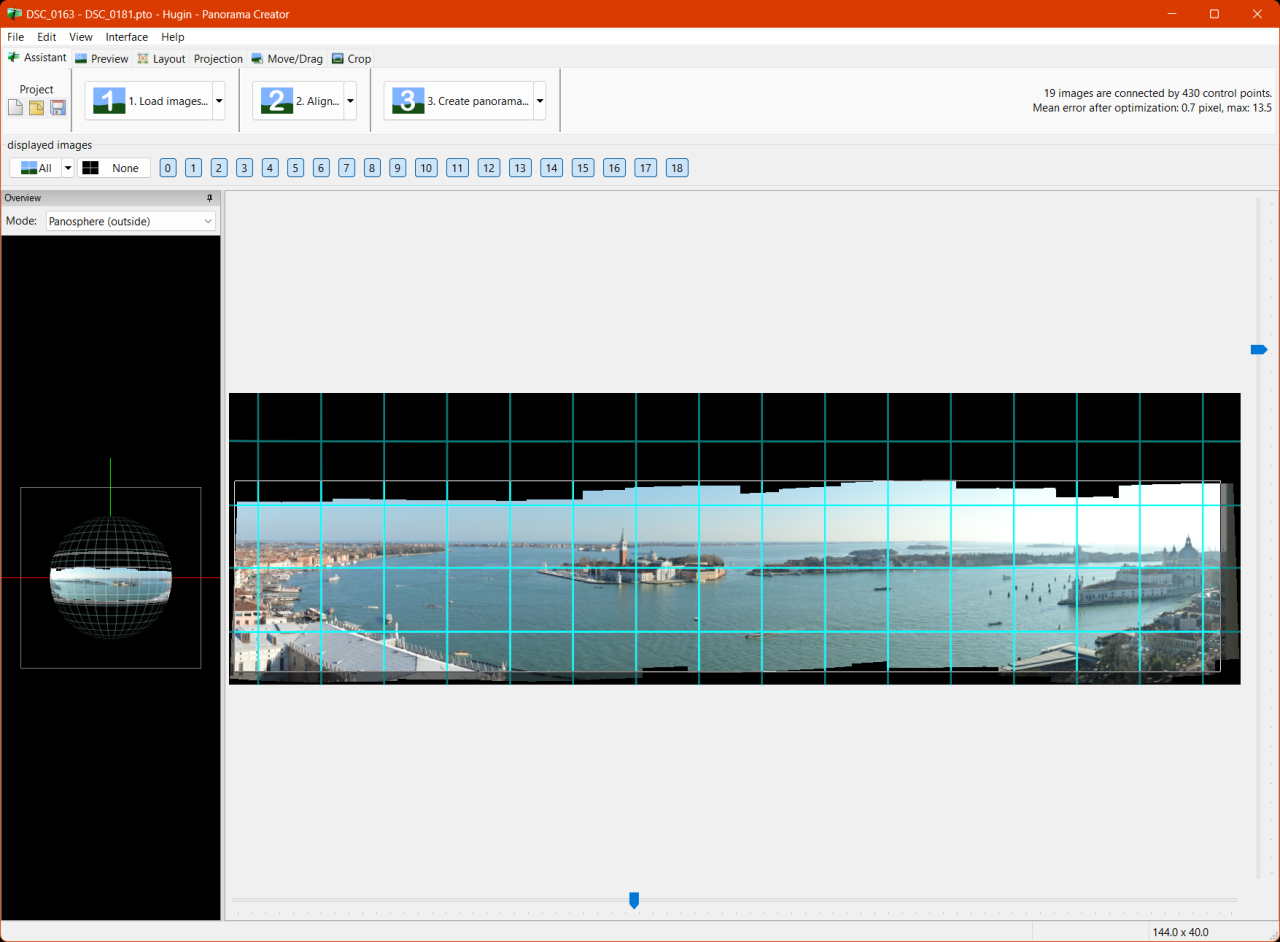
The user interface can be used in simple or advanced mode, with simple mode including a wizard that automates the stitching, and you only need to deviate from this if you need to handle tricky image alignments, for manual cropping and horizon levelling.
It’s worth noting that after Hugin aligns the images, it applies a default crop to ensure there are no gaps in the panorama. This can sometimes affect the framing and even cut out areas of the image you want to retain. If you want to ensure you have included everything and are happy to fill the gaps afterwards using generative fill, cloning, or other techniques, then click the Crop tab and adjust accordingly.
DigiKam (Free)
I used to rely on GeoSetter for geotagging photos, but its map view has become increasingly unreliable, and as of 2019 development seems to have stalled. In contrast, digiKam is a free, open source, actively developed photo management tool designed for handling large libraries and organizing images. It also enables geotagging by manually placing markers on a map, as well as assigning locations using GPX track data.
Since I already use Excire Foto for managing my photo library, I won’t need digiKam’s organizational features. However, its geotagging capabilities and detailed metadata handling will be quite useful.
DigiKam uses multiple different map providers. Google is still the best and if you want to use Google maps, especially the satellite view for viewing your photos on the map, you need to enter a Google Maps API key. You can still use Google Maps if you don’t, but you will see an overlay with ‘For Development Purposes Only’ across the map.
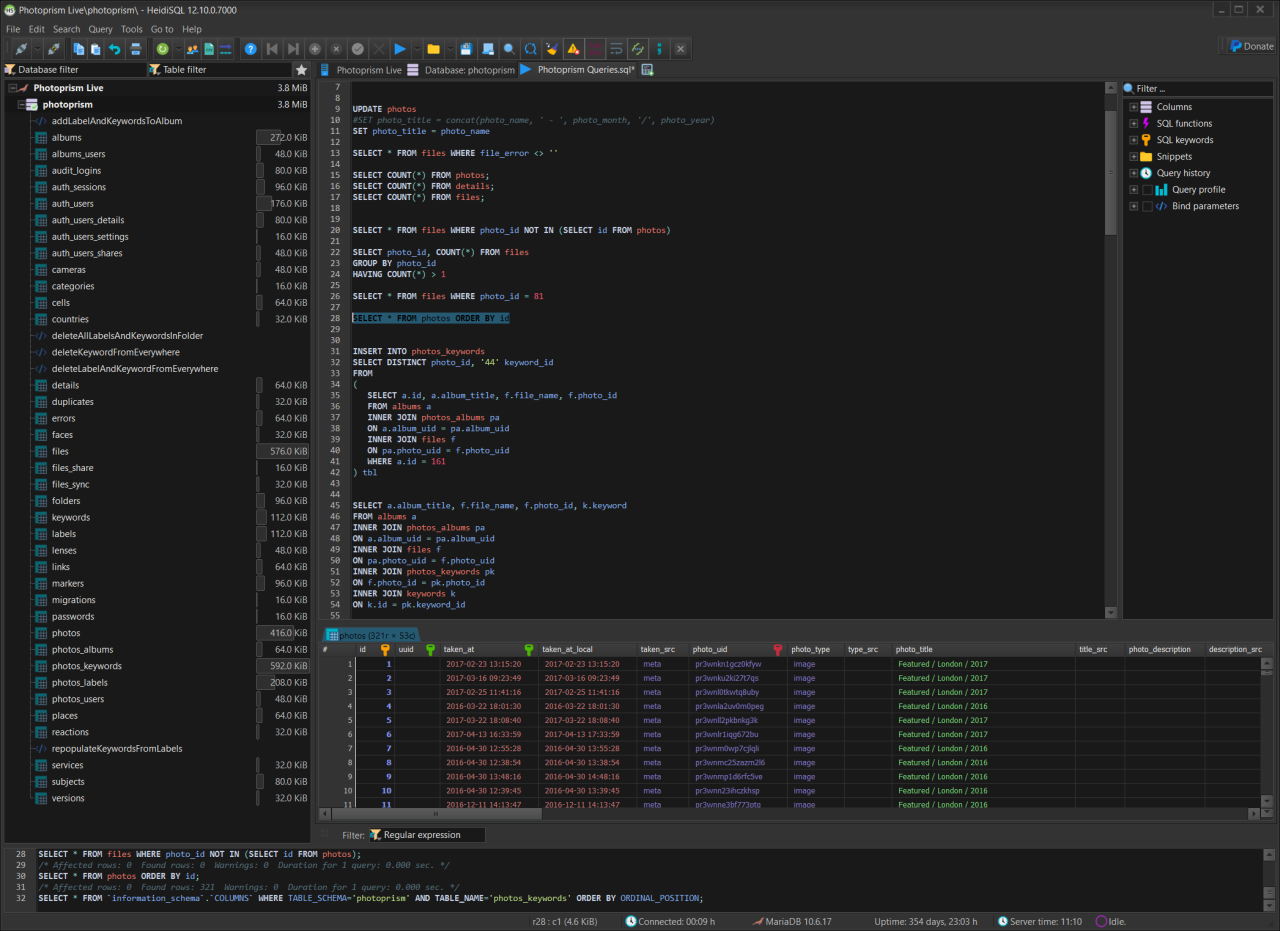
One specific use case that digiKam is useful for is running SQL queries. I am able to access digiKam’s SQLite database and run queries via one of the freeware database management tools – I use DBeaver. Excire’s database on the other hand is proprietary and not accessible. I can write data to file or XMP in Excire and then read it with digiKam and run queries on the database.
The reason I want database access is to run queries that show me metrics like how many photos have a specific keyword; how many have a specific location. etc. I can also make sweeping changes to keywords and update other data based on specific metadata or other data about the photo. I can then sync these changes back into the file metadata in digiKam. I had previously started to do this in PhotoPrism (MariaDB) using HeidiSQL, but will move this process upstream into digiKam, so that my offline albums retain the master data.
Excire does not export any face data. To get around that I will simply add the names of the people as keywords with the convention ‘Person:<name>’, e.g. ‘Person:Alice’.
ExifTool (Free)
If you need to extract metadata from virtually any file and want complete visibility, Phil Harvey’s ExifTool is widely regarded as the most trusted and comprehensive solution available.
In fact, many companies integrate ExifTool directly into their software to handle metadata. I’ve incorporated it into my own Photo Browser as well.
It’s a command line utility, but someone has written a GUI for it – ExifToolGui.
ExifTool supports a vast range of metadata formats including EXIF, IPTC, XMP, GPS, ICC profiles, and proprietary maker notes from dozens of camera brands. It can read, write, and edit metadata across more than 150 file types—including images, audio, video, PDFs, and Office documents.
Its command-line interface supports scripting and automation, making it ideal for forensic workflows, archival systems, and bulk metadata operations.
Bulk Rename Utility (Free for home use)
Bulk Rename Utility is a powerful tool with extensive renaming options. It supports basic EXIF metadata such as Date Taken, Camera Model, Orientation, and Dimensions for image-based renaming. For more advanced metadata handling, including conditional logic and custom tag access, its JavaScript renamer unlocks extended capabilities.
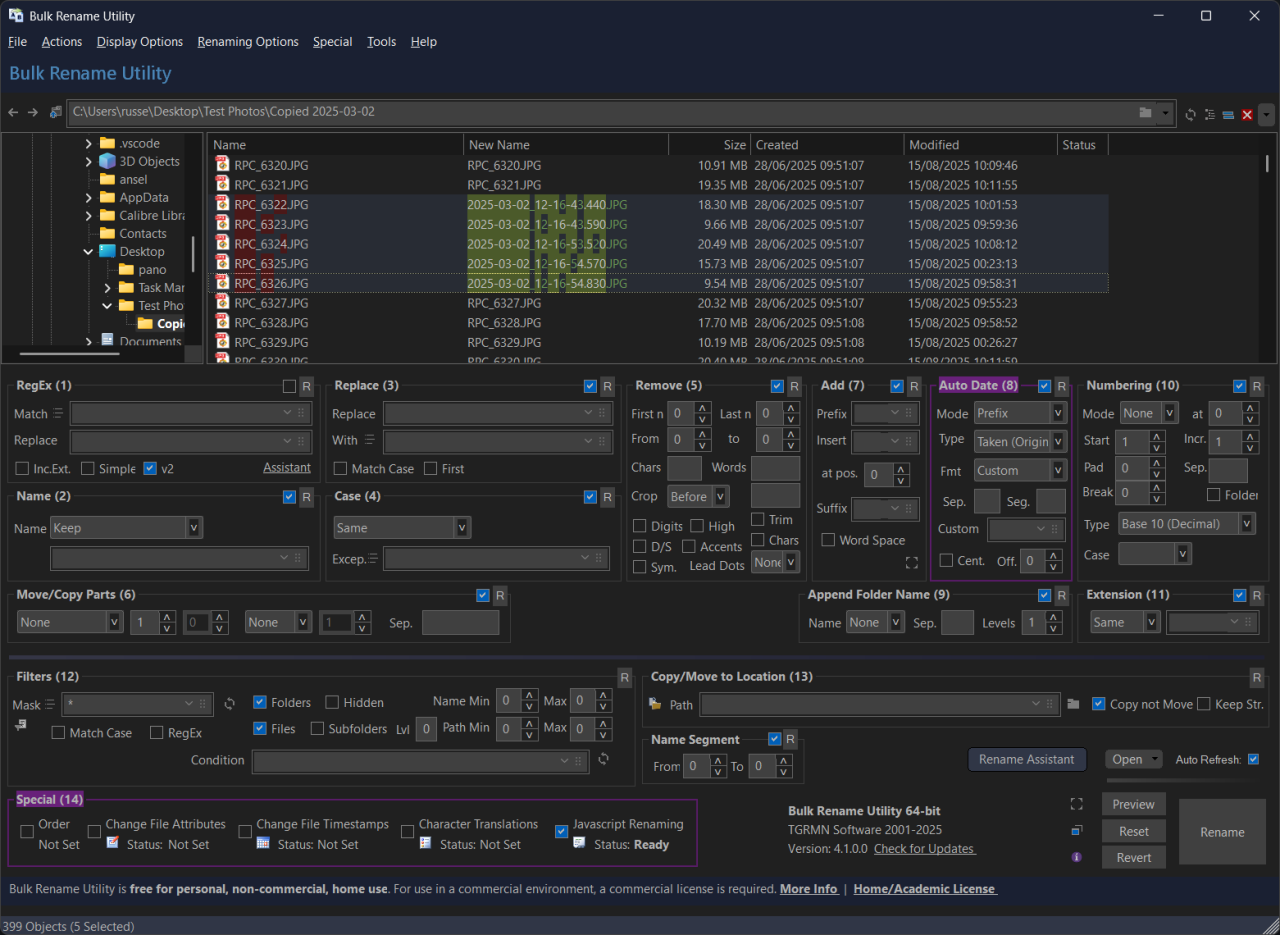
It features a web-based Rename Assistant powered by AI – just describe the task you want to perform, and it provides step-by-step guidance, including auto-generating JavaScript when needed! I asked the assistant to rename files with the Date Taken and Sub Seconds EXIF metadata, and it produced the following script:
{
  // read EXIF date/time (returns a Date) — fallback to filePropertyDate or ItemDate if needed
  var dt = filePropertyDate("exif:DateTimeOriginal") || filePropertyDate("exif:DateTime") || filePropertyDate("System.ItemDate") || object("modified");
  // read subseconds as string from EXIF (common tags: SubSecTimeOriginal or SubSecTime)
  var sub = fileProperty("exif:SubSecTimeOriginal") || fileProperty("exif:SubSecTime") || "";
  // normalize subseconds to 3 digits (milliseconds). If tag contains more or fewer digits, trim/pad right.
  if (sub) {
    // keep only digits
    sub = sub.replace(/\D/g, "");
    if (sub.length > 3) sub = sub.substring(0,3);
    while (sub.length < 3) sub = sub + "0";
  } else {
    sub = "000";
  }
  // format date/time part (use formatDateTime helper)
  var datePart = formatDateTime(dt, "YYYY-MM-DD_HH-mm-ss");
  // build final newName (without extension). Change ordering/sep as you like.
  newName = datePart + "." + sub;
}Workflow
Application Usage
Adobe Photoshop and Lightroom previously formed the backbone of my editing workflow. The table below outlines how the new tools I’ve adopted now take over those roles, offering equivalent or improved functionality across key tasks
| Original Application | Functional Replacement |
|---|---|
| Lightroom |
Cataloguing, Keywords, Face Recognition: Excire Foto RAW Editing: ON1 Photo RAW, Affinity Photo Metadata: Excire Foto, ON1 Photo RAW, DigiKam, ExifTool Batch Editing: ON1 Photo RAW |
| Photoshop / Camera RAW |
Precision Editing: Affinity Photo HDR Merging: Luminar Neo Panorama Stitching: Luminar Neo, Hugin |
The table below outlines the main areas of my workflow and the software that I will be using going forward (as of September 2025):
| Workflow Task | Software | Comments |
|---|---|---|
| Browsing and Culling | Faststone, XnView MP, Excire Foto | Excire has culling projects that use AI to assist with identifying reject photos. |
| Basic Editing (Crop, Rotate) | FastStone | Fast and simple. Intuitive user interface for quick easy adjustments. |
| Cataloguing | Excire Foto | Powerful and has multiple AI tools including a text-based natural language AI search. |
| Full Editing | ON1 Photo RAW, Affinity Photo, Luminar Neo | Affinity for Photoshop-style editing; ON1 and Luminar for modular editing through simplified slider-based tools and effects that make use of AI. |
| Batch Processing | ON1 Photo RAW, Bulk Rename Utility, ExifTool | ON1 Photo RAW for batch editing, and Bulk Rename Utility for renaming files. ExifTool for scripted metadata operations. |
| AI Upscaling | ON1 Photo RAW (Resize AI) | Stunning upscaling for cropped photos that are low resolution. |
| HDR Merging | Luminar Neo | Optimal HDR images with no ghosting. |
| Panorama Stitching | Luminar Neo, Hugin | Quick easy panorama stitching with Hugin for more challenging panoramas. |
| Keywording and Face Recognition | Excire Foto | Assign and store keywords in XMP metadata. Recognise and tag faces. |
| Geotagging | Excire Foto, DigiKam, ON1 Photo RAW | Set locations on a map. Assign locations based on a GPX tracking file. |
| Photo Restoration | Topaz Photo AI, Luminar Neo (Fall 2025 update) | Recover faces and damaged photos. |
| Metadata Editing | Excire Foto, ON1 Photo RAW, ExifTool, DigiKam | Different tools depending on the requirement. |
| Database Access | DigiKam (SQLite) | Run analytics queries against photos and metadata |
Browsing & Culling
The first stage of my workflow is culling – filtering out the unusable shots: anything blurred, poorly composed, misconfigured, or simply dull. While many photographers rely on Lightroom or similar catalogue-based tools for this step, I prefer a faster, more streamlined approach – I use software that lets me browse through the filesystem directly, avoiding the overhead of importing everything into a catalogue just to identify what’s worth keeping. I use FastStone Image Viewer or alternatively XnView MP.
As part of the culling process, I decide which images are worth retaining in RAW format. Most everyday family shots likely won’t require post-processing, so I can safely discard the RAW versions for those.
Excire includes a feature called Culling Projects, which leverages AI to automatically flag and identify rejected images during the review process. This is an option, although the files will require importing into a catalogue first.
Organisation
My family photo album is stored in a dedicated folder on my PC and mirrored across two external hard drives for redundancy. I keep my showcase images on OneDrive, organized within a folder hierarchy that matches my workflow.
The old naming convention for my album used the year, month, month instance number (for multiple albums in one month) and the album name, and the photos themselves had a 3-digit instance number. Raw files were not renamed and kept separate. For example:
- 2016
- 2016-05-01 New York
- 2016-05-01-001.jpg
- 2016-05-01-002.jpg
- 2016-05-01-003.jpg
- 2016-05-01 New York
I decided to change this, so now for the album folder I am using the date taken of the first photo in the album, and for the photos, as follows:
- Where EXIF metadata exists, combine the EXIF ‘DateTimeOriginal’ and ‘SubSecTimeOriginal’ to create a unique timestamp.
- Where no EXIF metadata exists, use the earlier of the Created or Modified date plus an instance number.
- Album name is embedded as a keyword.
- RAW files that I choose to keep will have the same name as the JPG, but obviously with a different extension.
The following is an example of the new convention:
- 2016
- 2016-05-21 New York
- 2016-05-21_13-48-22.240.jpg
- 2016-05-21_13-48-22.240.NEF
- 2016-05-21_16-22-19.740.jpg
- 2016-05-21_16-22-19.920.jpg
- 2016-05-23_09-36-47.110.jpg
- 2016-05-23_09-36-47.110.NEF
- 2016-05-21 New York
Options for renaming files include a script in combination with ExifTool, or Bulk Rename Utility (JavaScript Renaming).
Post-Processing
Once I have chosen photos that I want to post-process, I use any of Affinity Photo, ON1 Photo Raw, Luminar Neo to process the photo.
Depending on my requirements I may use more than one of the applications. For example, I might create an HDR photo using Luminar Neo, and then fine tune the colours using the Selective Colour tool in Affinity if I don’t get the results I like using the HSL tool in Luminar Neo.
I start by applying lens correction if that doesn’t happen automatically, followed my making basic adjustments like exposure, contrast, highlights, shadows, temperature, etc. to get a basic correction going.
After that I usually check for dust spots or any unwanted artifacts in the photo and remove those with one or more appropriate tools.
Depending on the type of photo, and what I want to do with it, I’ll then move on to more detailed adjustments like HSL and selective colour, followed by any effects I want to use.
Finally, before exporting the photo I add my signature.
Panoramas
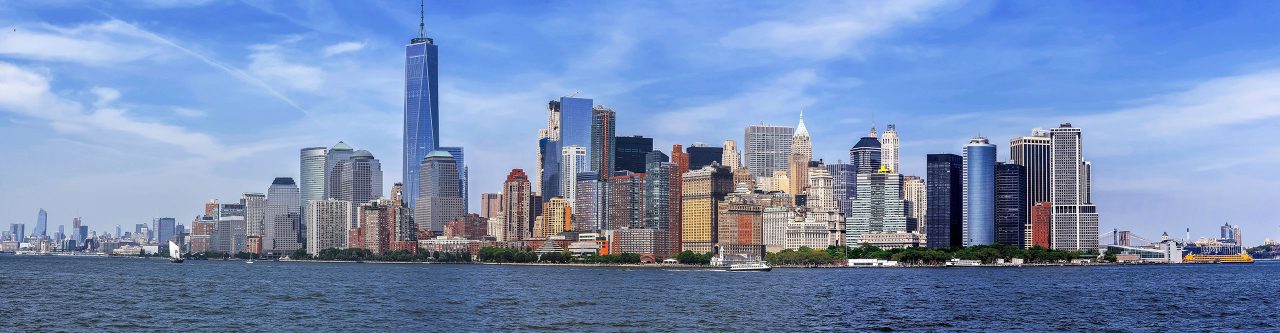
I love panoramas, because I love landscapes, especially when there is a good view – like from a mountain top or a high building, or any scene too wide to fit into a standard photo frame.
To capture the frames required, I set the aperture to around f/8-f/11 depending on light, and then set the ISO accordingly (I almost exclusively work on Aperture Priority). After focussing on the first frame, usually in an area not too bright or dark, I hold down the exposure lock button (AE-L on the D750) which ensures all frames for the panorama are captured with the same exposure values. I then proceed to take multiple overlapping photos, including just under a third of the previous frame in the next frame (paying attention to the horizon), and then stitch them together later on the PC.
I used Hugin previously, a free open-source panorama stitcher for this. Hugin has a wizard that does most of the work for you. Even so it takes a fair amount of time to create one panorama. I have switched to using Luminar Neo to stich panoramas now as it does the job automatically, quickly, and the results are impressive. I can always fall back on Hugin for any challenging panoramas.
I have also used Photoshop for stitching panoramas, and it seems to do a reasonably good job. I have read that PTGui is by far the best software to use for stitching panoramas, but it is not cheap.
My old Samsung phone had a Surround Shot mode, which allowed you to take a full spherical 360° photos. The phone stitches it all together for you, and the results were quite impressive for the time. It was not perfect though and sometimes filled in areas where it could not work out the overlap. This usually happened if you didn’t keep the phone in one location while taking the photos. Sadly, Samsung have removed the feature from the newer phones. While the results were not perfect, it was the only way to capture 360° spherical panoramas without a dedicated camera. It’s not feasible to try and take all the photos and then stich them together later. If you missed a spot you are out of luck.
I used to use Dermandar to host my panoramas but can no longer embed them. As of October 2025 the site has been retired.
I am now hosting these on my own website – Panoramas, using free self-hosted viewers I have found online – Panellum, and Paver.
I have had a look at Marzipano and may use that in future.
Here are some interesting panorama websites:
My Cameras
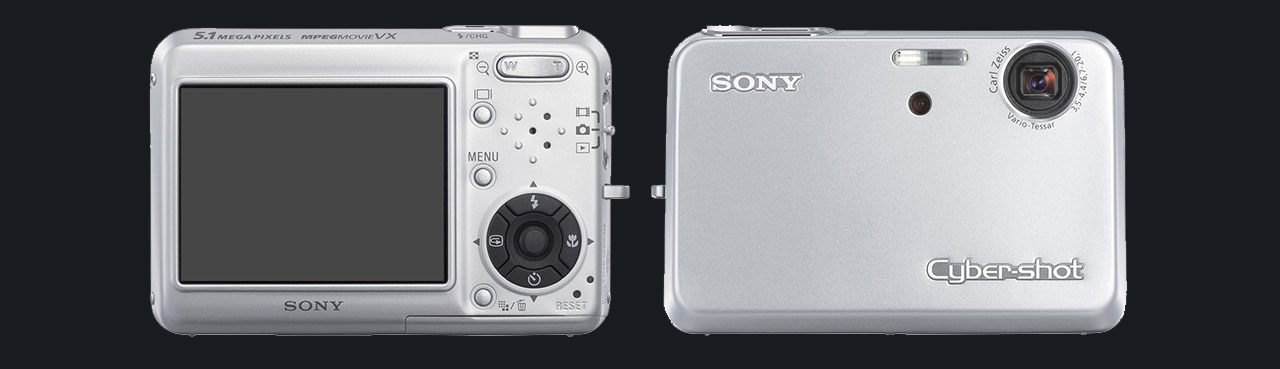
Sony DSC-T3
When I was young, I had various point & shoot film cameras, and have also used some disposable cameras along the way. My first digital camera was the Sony T3, which was a good little camera and fitted easily into my pocket, which suited me back then.
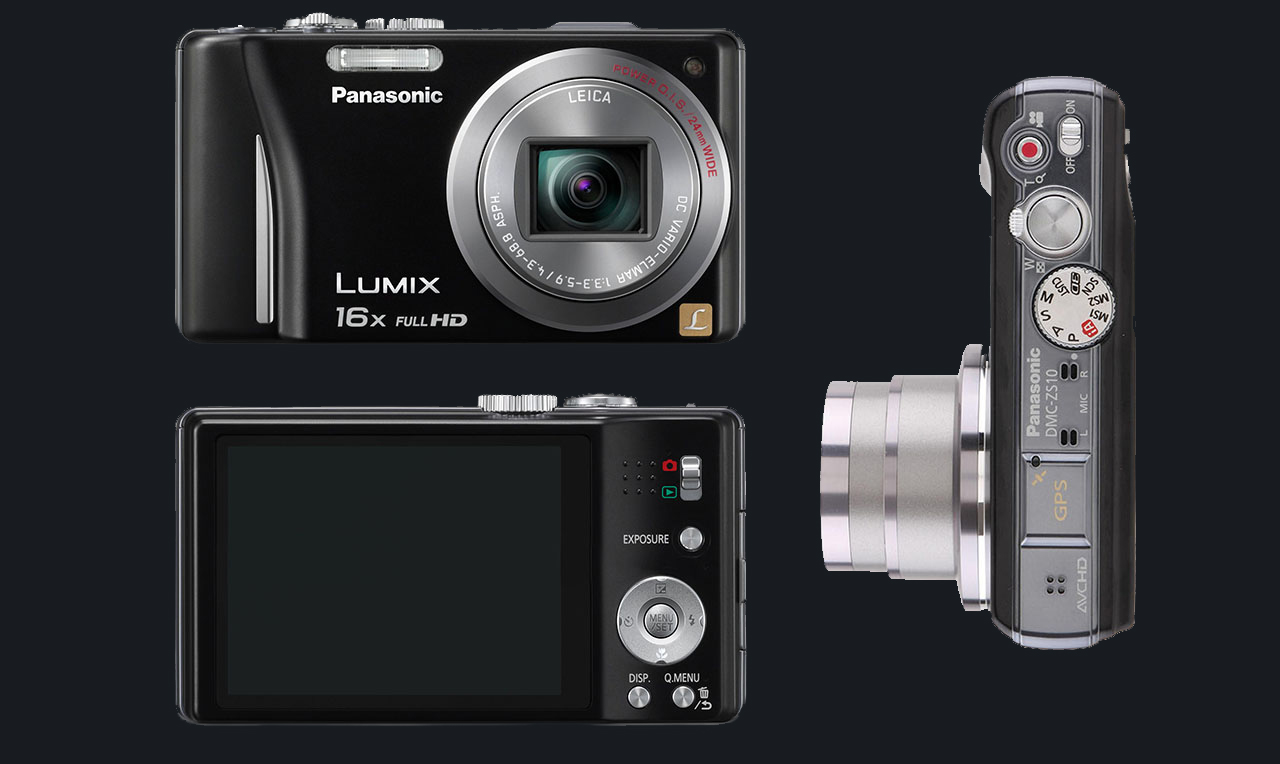
Panasonic DMC-ZS10
At the time the technology was at the point where your phone could play music as well as take decent photos, and I was convinced that I would no longer need a separate camera – a view that many people hold today. However, like smartphones camera technology progressed, and cameras with 10x and 12x zoom emerged. I was not happy with the single focal range of my phone’s camera, nor the resolution, so I purchased the Panasonic DMC-ZS10, which was a nice compact zoom camera.
Nikon D3200
A few years later I started to do some self-study and learned the basic photography concepts and techniques and realised that the Panasonic was rather limited when compared to a DSLR. A friend of mine had a DSLR and I was impressed with the quality of photos it produced, and the control you have over camera settings.
After doing some research, I chose the Nikon D3200 – it was an entry-level camera that offered great value, higher resolution than many of its peers, and even came with an ‘assistant mode’… though I barely touched that feature!
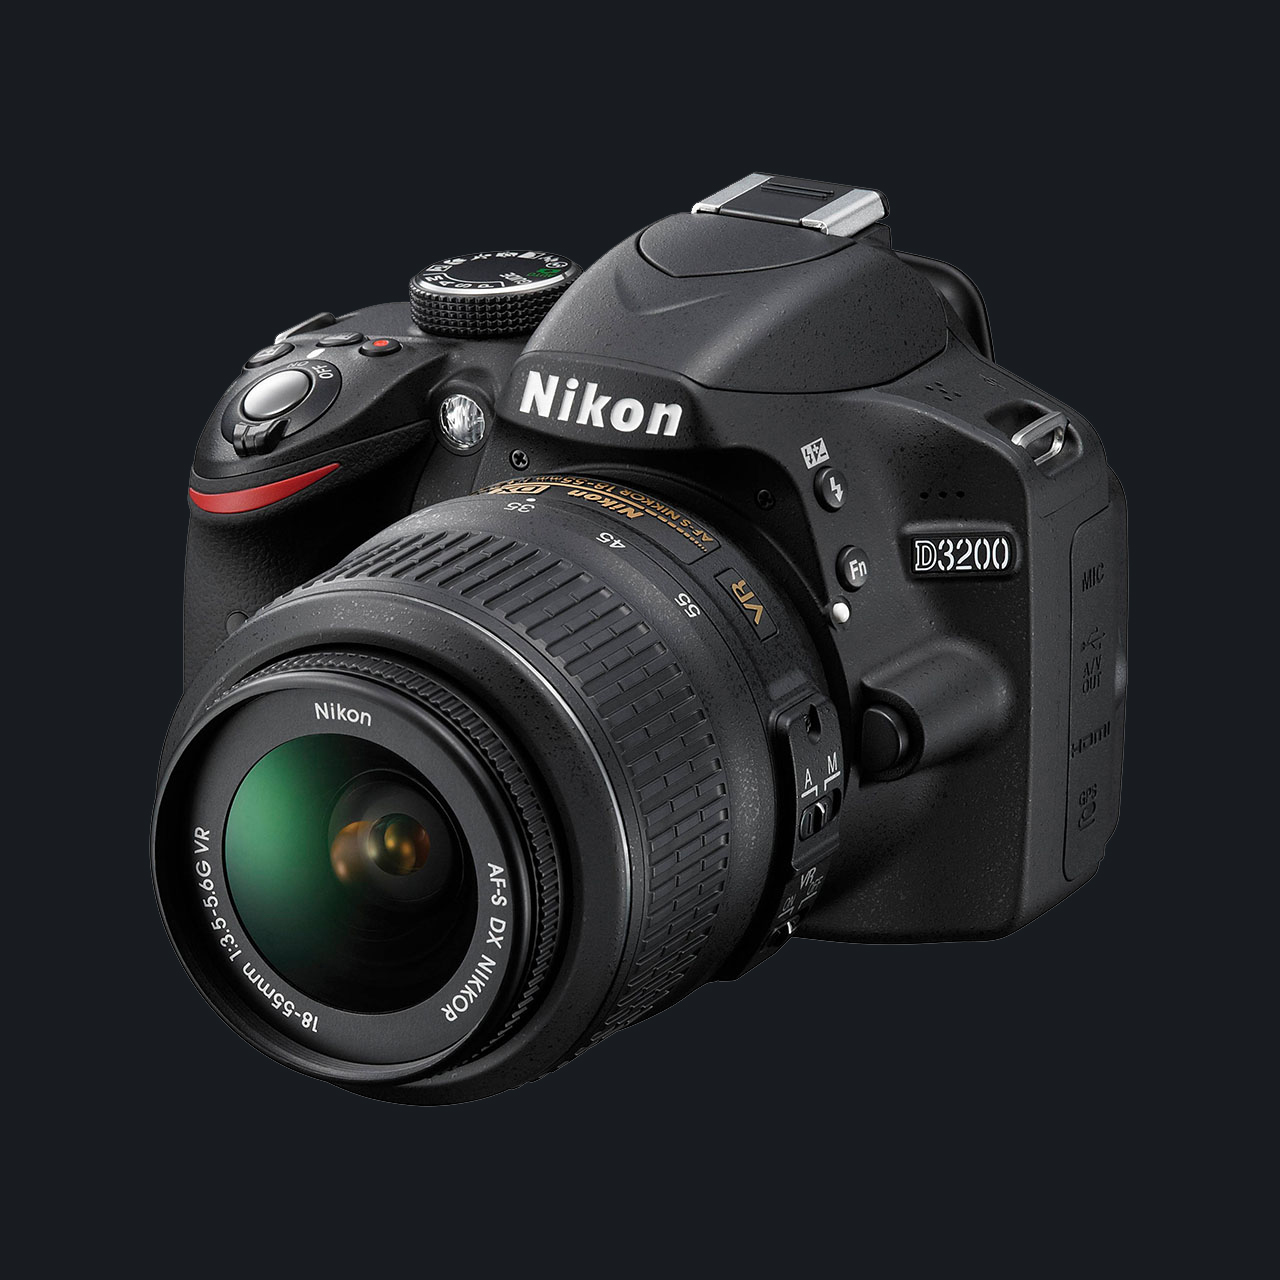
I originally bought a fixed 35mm and a 55-300mm telephoto zoom lens to go with the camera. My first trip with this new camera and lenses was to Iceland. While walking around I quickly became frustrated with having to continuously change the lens when I needed to take telephoto or wide-angle photos. A while later and after some research I decided to purchase a Tamron 18-270mm lens. I wanted the Nikon 18-300mm, but it was more than double the price, and I could not justify it having not tried either.
The Tamron turned out to be a solid purchase – I genuinely enjoyed using it. With its broad focal range and lightweight build, it’s incredibly portable and versatile. If you’re looking for a reliable walk-around lens for a DX camera, this one’s well worth considering. Just keep in mind that, as an all-purpose lens, it doesn’t match the sharpness of more specialized lenses.
Later on, I purchased the Tamron 10-24mm ultra-wide zoom lens second hand, as I wanted to photograph architecture and interiors of old houses, and this lens can be used for some nice creative effects.
I use the fixed 35mm lens for portraits, parties and other events, sometimes with a speed flash if at night.
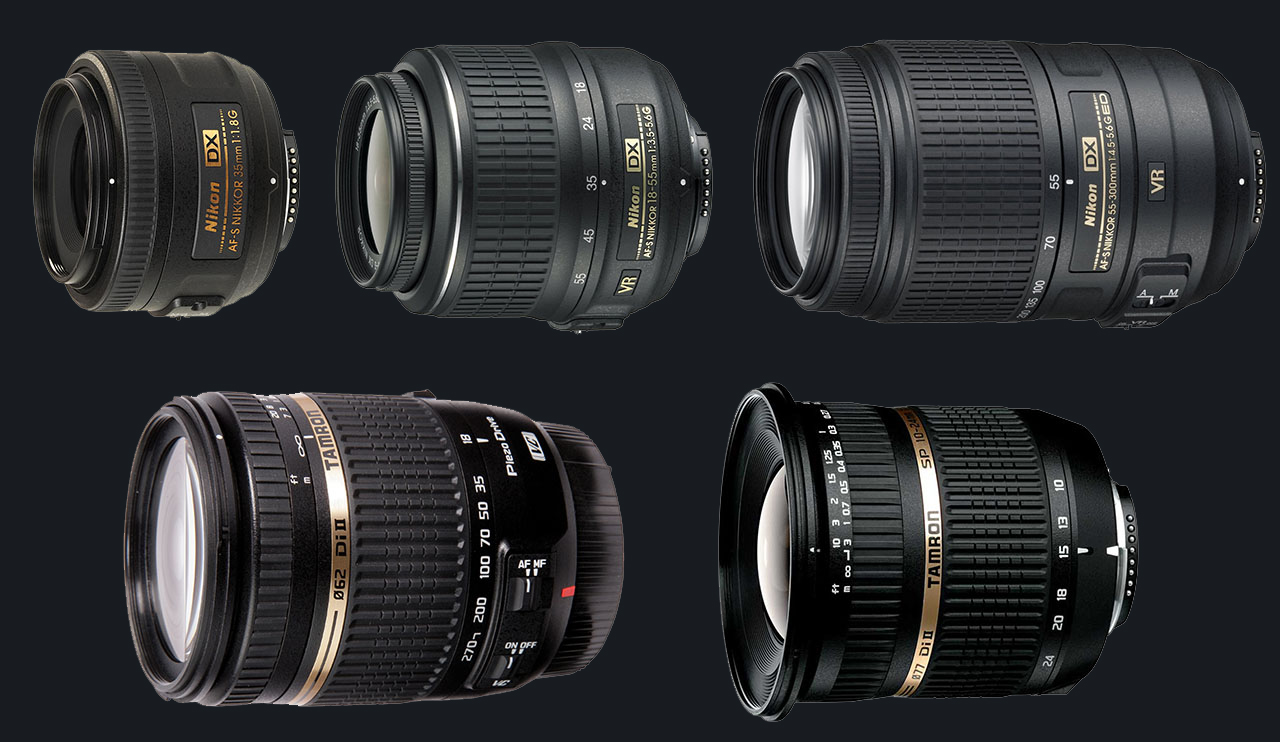
The DX lenses I have are as follows:
- Prime: AF-S Nikkor 35mm f/1.8G
- Wide-Angle Zoom: Tamron 10-24mm f/4.5-6.3 Di II VC PZD
- Standard Zoom: AF-S Nikkor 18-55mm f/3.5-5.6G
- Telephoto Zoom: AF-S Nikkor 55-300mm f/4.5-5.6
- All-In-One Zoom: Tamron 18-270mm f/3.5-6.3 Di II VC PZD
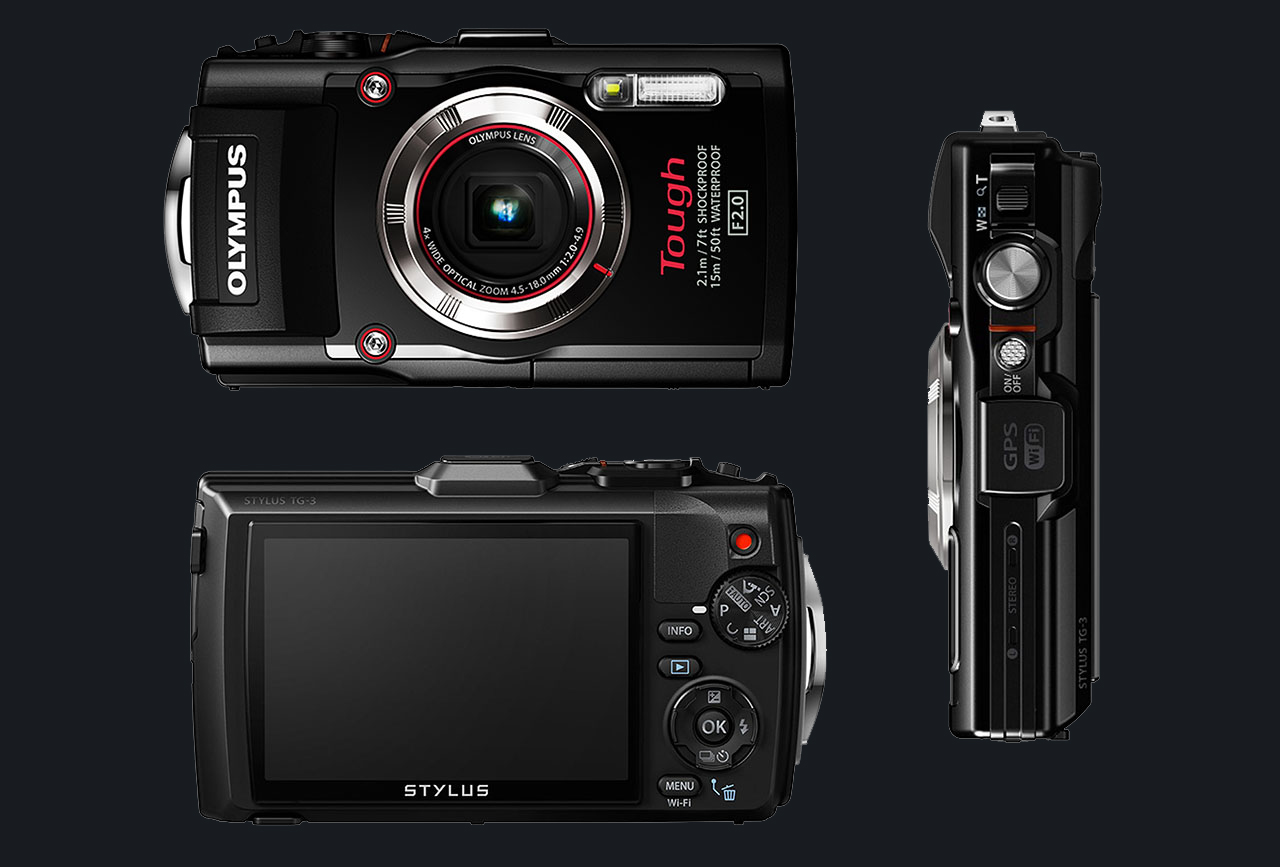
Olympus Tough TG-3
On snorkelling holidays, I occasionally bought disposable underwater cameras, but was disappointed with the quality of the photos. Rather than buying an expensive underwater enclosure for one of my cameras, I decided to get a dedicated underwater point & shoot camera, and I decided on the Olympus Tough TG-3. It is a brilliant little camera with an aperture of f/2.0, and is waterproof to 10m, and can be dropped from 2m apparently, and left in the sand on the beach. If used in the sunshine you need to stop it down, as the maximum shutter speed is 1/2000s, and at f/2.0 you will overexpose your photos.
Nikon D750
After 4 years of using the D3200 and around 100,000 photos, I decided it was time for an upgrade. After a lot of research, and for various reasons I won’t go into here I decided on the Nikon D750. I love this camera! It has a nice deep grip; lots of customisable controls; a newer better 24MP sensor; 3D focus tracking, and many other nice features that I wanted. It is a full frame (FX) camera and is slightly better than the ‘cropped sensor’ (DX) range when it comes to image quality, depth of field, and low light sensitivity. It also has a screen that can pivot up and down, for those difficult shots. The main features of this camera are:
- 24.3MP FX-format CMOS sensor
- 51-point Multi-CAM 3500FX II autofocus system
- 3D Tracking autofocus
- Highlight-weighted metering
- 6.5 fps continuous shooting
- Tilt-angle 3.2″ LCD (1229k-dot)
- Built-in Wi-Fi
- Weather-sealed magnesium alloy + carbon fibre body
- ISO 100–12,800 (expandable to 51,200)
- Dual SD card slots
- Customizable Fn, AE-L/AF-L, and preview buttons
- Power aperture control in live view
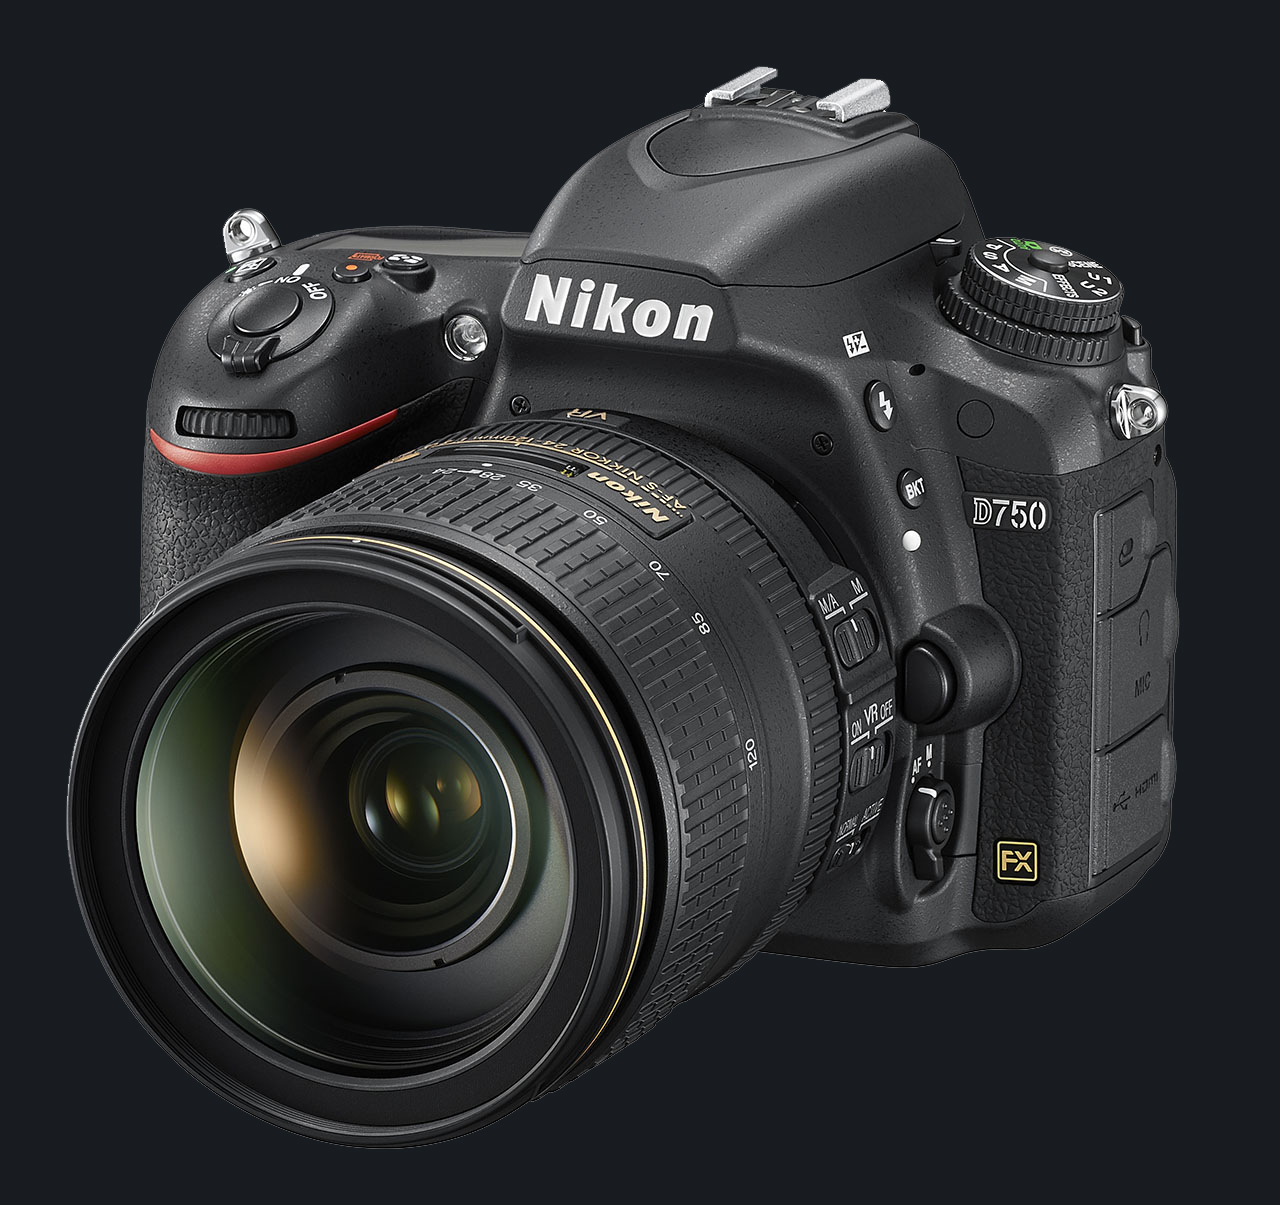
I wanted a single lens I could take anywhere and capture a wide range of photos, from wide angle landscapes to close-ups of animals – so a wide angle and telephoto zoom all in one. And for this I got the 28-300mm lens. I also purchased the Tamron 150-600mm telephoto zoom as I love taking photos of wildlife, including birds in flight. A lot of people say that this is a good lens, and I am amazed at the photos I have taken with it. I am not a professional photographer, but this lens feels good and is generally brilliant!
I subsequently bought the 18-35mm lens for wide angles, and the 24-85mm for a standard zoom lens where I don’t need extended zoom. The f/4.0 range of lenses would also be a nice addition to my collection.
In 2025 I bought a second-hand mint condition AF-S 24-70mm f/2.8 – not the VR version. This lens has a constant maximum aperture of f/2.8 and is the sharpest lens in the range. Great for landscapes and portraits. I also bought a second-hand AF-P 70-300mm f/4.5-5.6E ED, as I did not have a dedicated telephoto lens in that range – this one is much sharper and has quicker, quieter and more accurate autofocus than the 28-300mm.
The FX lenses I have currently are as follows:
- Prime: AF-S Nikkor 50mm f/1.8G
- Wide-Angle Zoom: AF-S Nikkor 18-35mm f/3.5-4.5G ED
- Standard Zoom: AF-S Nikkor 24-85mm f/3.5-4.5G ED
- Standard Zoom: AF-S Nikkor 24-70mm f/2.8G ED N
- Telephoto Zoom: AF-P Nikkor 70-300mm f/4.5-5.6E ED
- Telephoto Zoom: Tamron 150-600mm f/5-6.3 Di VC USD
- All-In-One Zoom: AF-S Nikkor 28-300 f/3.5-5.6G ED

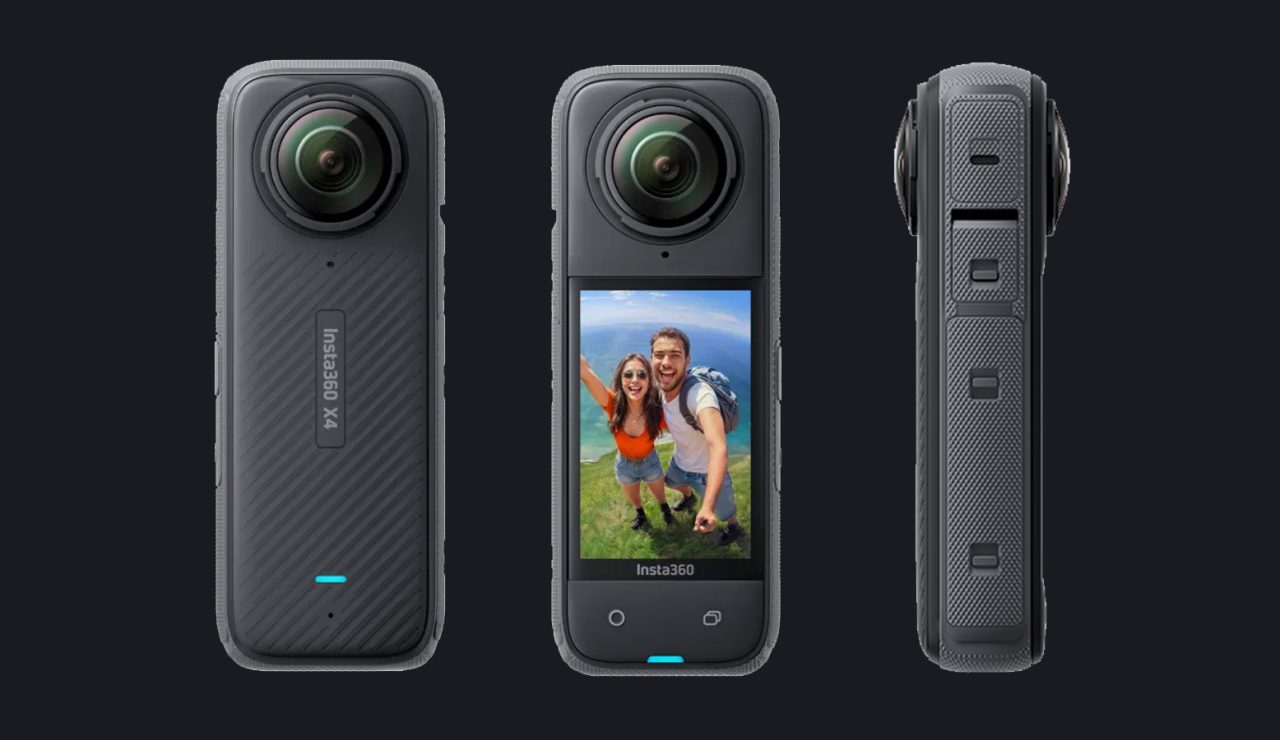
Insta360
To create the cylindrical panoramas on my Panoramas page, I took a number of overlapping photos along a horizontal plane and then stitched them together (see Panoramas above below for more info). For capturing 360° spherical panoramas, I used to rely on the PhotoSphere feature in my Samsung phone’s camera, but sadly Samsung removed that functionality. Although it was a painful process, I preferred it to nothing.
Dedicated 360° cameras have been around for a while now (as of 2025), and the quality, features, phone app and desktop software have matured to the point that they produce good quality photos and video, but still obviously not as good as taking separate photos with a DSLR and stitching them together.
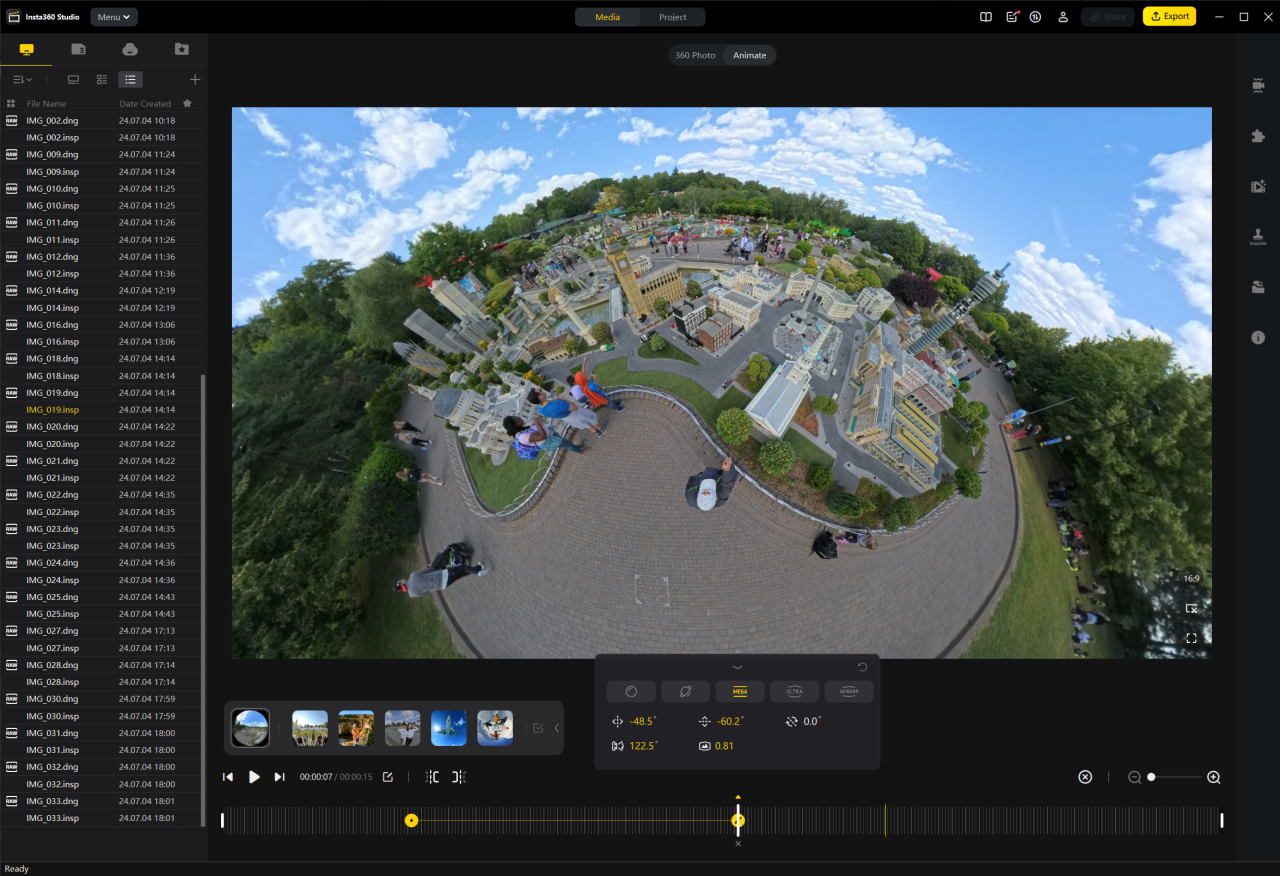
After reviewing various makes and models I decided to get myself an Insta360 camera, which captures an 8K image, although this is spread around the full 360 degrees. The camera has a great phone app and desktop software, Insta360 Studio, which allows you to produce some creative images and video.
The desktop software, Insta360 Studio is great and allows you to create a lot of interesting effects from photos and video.
Nikon D5500
In 2025 I bought a second-hand Nikon D5500 in excellent condition. I love this camera as it is very small and light and feels good in the hand. Compared to the aging D3200, it’s a clear upgrade: more advanced features, better handling, and noticeably smaller and lighter.
It came with an AF-S DX NIKKOR 18-55mm f/3.5-5.6G VR II kit lens which is amazingly light. It has a plastic lens mount, but I don’t anticipate that to be an issue due to its light weight.
This camera is ideal for times when I want to travel light and leave the bulkier D750 at home. If I am going somewhere interesting I can take both cameras, and it will prevent the need to change lenses.
For example, I could pair the D5500 with the Nikon 55–300mm, while the D750 carries the Nikon 24–70mm f/2.8. Attaching the FX prime 50mm f/1.8 to the D5500 will serve me well for portraits, and it will give me an effective 75mm at a much cheaper price than buying an 85mm prime for the D750.
If I really wanted to push the limits, I could mount my Tamron 150–600mm on the D5500 and get an effective 900mm of reach!
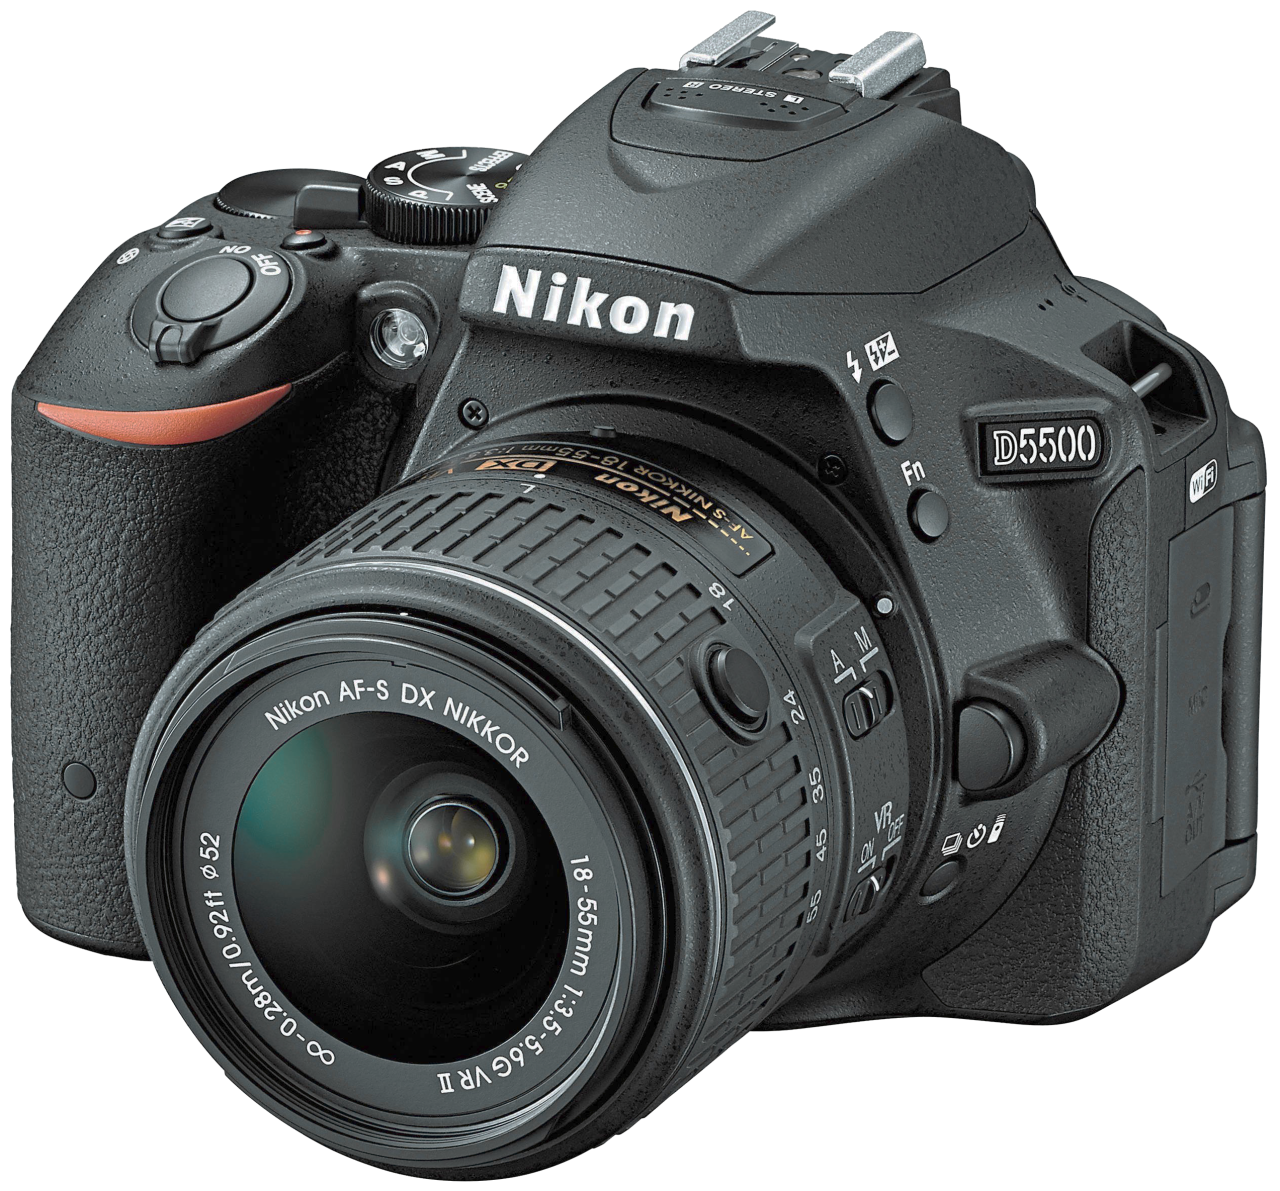
This camera has several advantages over the D3200, some of which are:
- 39-point autofocus system vs. 11-point on the D3200
- 3.2″ Articulating touchscreen LCD
- 2,016-pixel RGB metering sensor vs 420 on the D3200
- No low-pass filter on the D5500 – Sharper
- Improved dynamic range
- Higher ISO range
- Smaller and lighter body
- Improved grip design
- Longer lasting battery
- More functionality overall
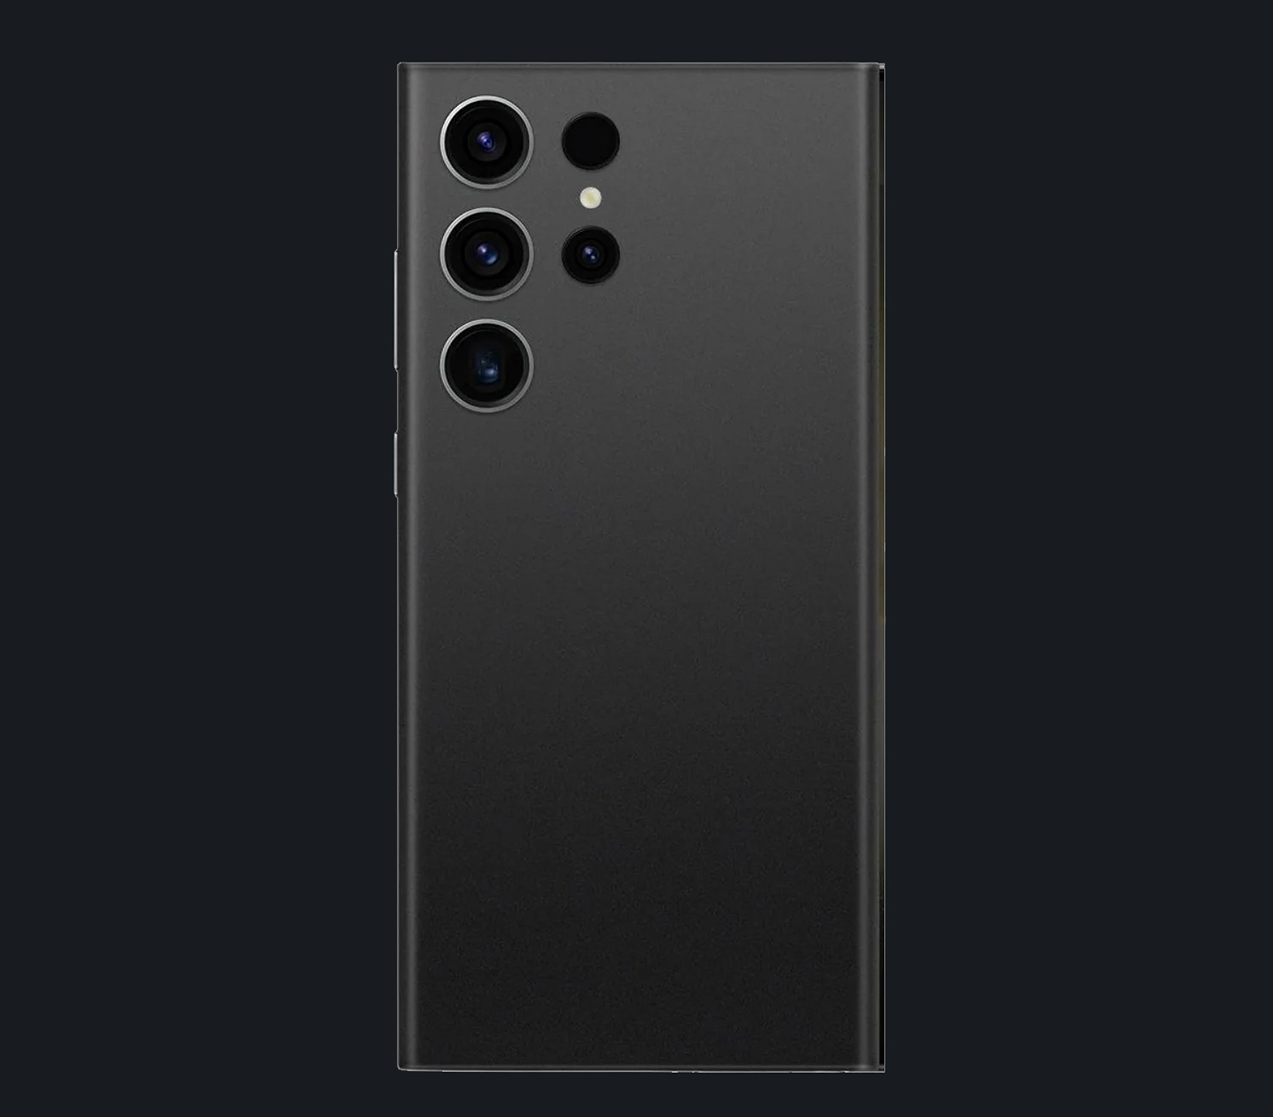
Phone Cameras
I have had a number of smart phones over the years. The technology of smartphones and the built-in cameras have improved to the point that most people don’t bother with a separate camera anymore. I currently (2024) have a Samsung Galaxy S22 Ultra which produces brilliant photos, but they are nowhere near a match for a full frame DSLR. I do use my phone’s camera if I don’t have my DSLR with me, or if I want to take a photo to share with someone immediately. There are definitely some advantages to using the phone camera.
Lens Filters
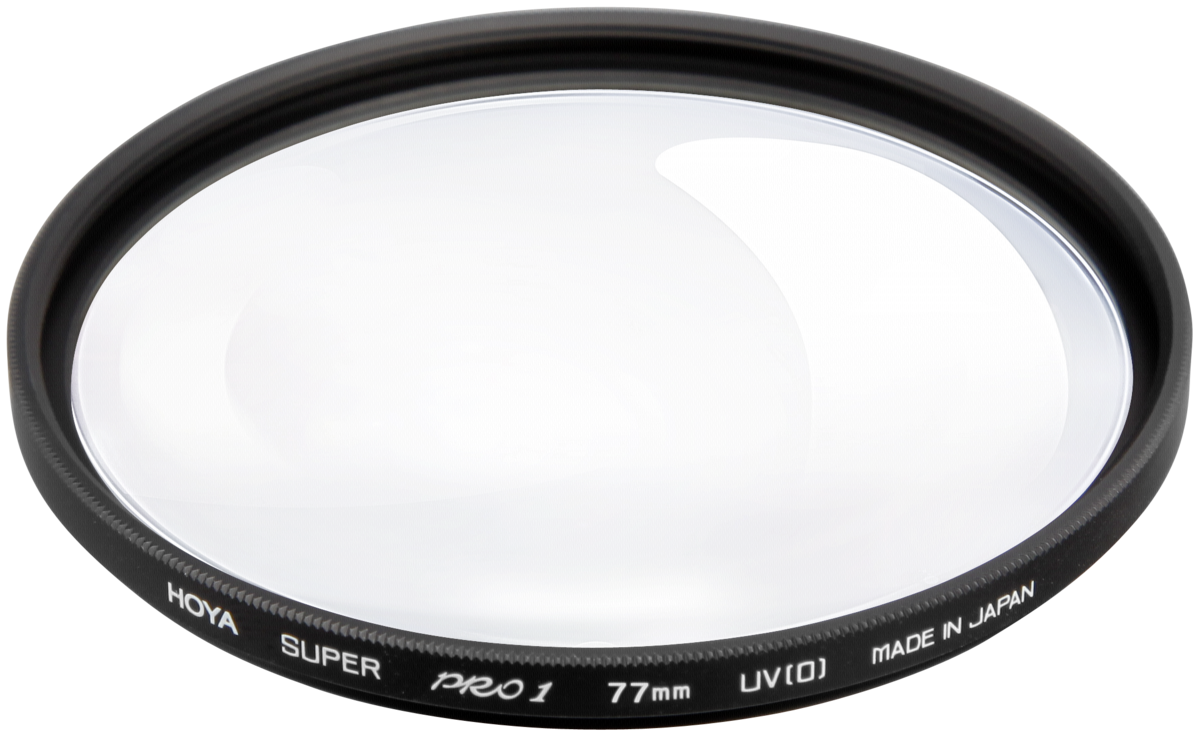
UV Filters
I use Hoya UV filters on all my lenses. Hoya is a reputable brand, and their filters are good quality. These are no longer used primarily for UV protection as was common in the film era, but rather for lens protection. These filters help shield against scratches from dust and sand, and moisture, and their flat surface makes cleaning far easier and safer than wiping the curved glass of the lens itself, especially when removing abrasive particles like dust. They also act as a physical buffer. If the lens takes a knock, the filter may absorb the impact and crack, potentially saving the lens from damage.
This is just my personal opinion. Some argue that UV filters offer little real protection and may even degrade image quality. I haven’t noticed any loss in clarity, and I feel more comfortable wiping dust off the filter with my T-shirt in the field than risking scratches to the lens itself.
Circular Polarising Filters
A CPL filter consists of two glass elements – the rear element screws onto your lens, and the front element rotates, allowing you to adjust the polarising effect depending on the angle of light. It works by filtering out polarised light, the kind that bounces off non-metallic surfaces like water, glass, or wet foliage. By rotating the filter, you control how much of that reflected light is blocked.
This allows you to capture deep blue skies without the haze, or details in water that are normally obscured by reflections. It has a varied effect on any other surfaces that have reflections.
Note: A CPL filter can reduce light coming into the camera and can therefore also function as an ND filter.
Neutral Density Filters
Neutral Density filters limit the amount of light reaching the camera sensor without altering colour balance. At first glance, this might seem counterintuitive as photographers usually want more light, not less! However, ND filters are essential when creative control matters more than brightness.
Reducing light when shooting in bright sunlight allows you to slow down the shutter speed, or widen aperture, and this is generally desired for the following main reasons:
- Smooth water effect, e.g. waterfalls or the sea. Longer shutter speeds blur anything moving in the image.
- Using a wide aperture for shallow depth of field can push your shutter speed to its limits, often resulting in blown highlights and an overly bright image.
Depending on how much you want to slow the shutter, you could get away with setting your camera to the lowest ISO and highest Aperture and attach a circular polarising filter if you have one.